Hearty Shepherd’s Pie – Comfort Food Classic
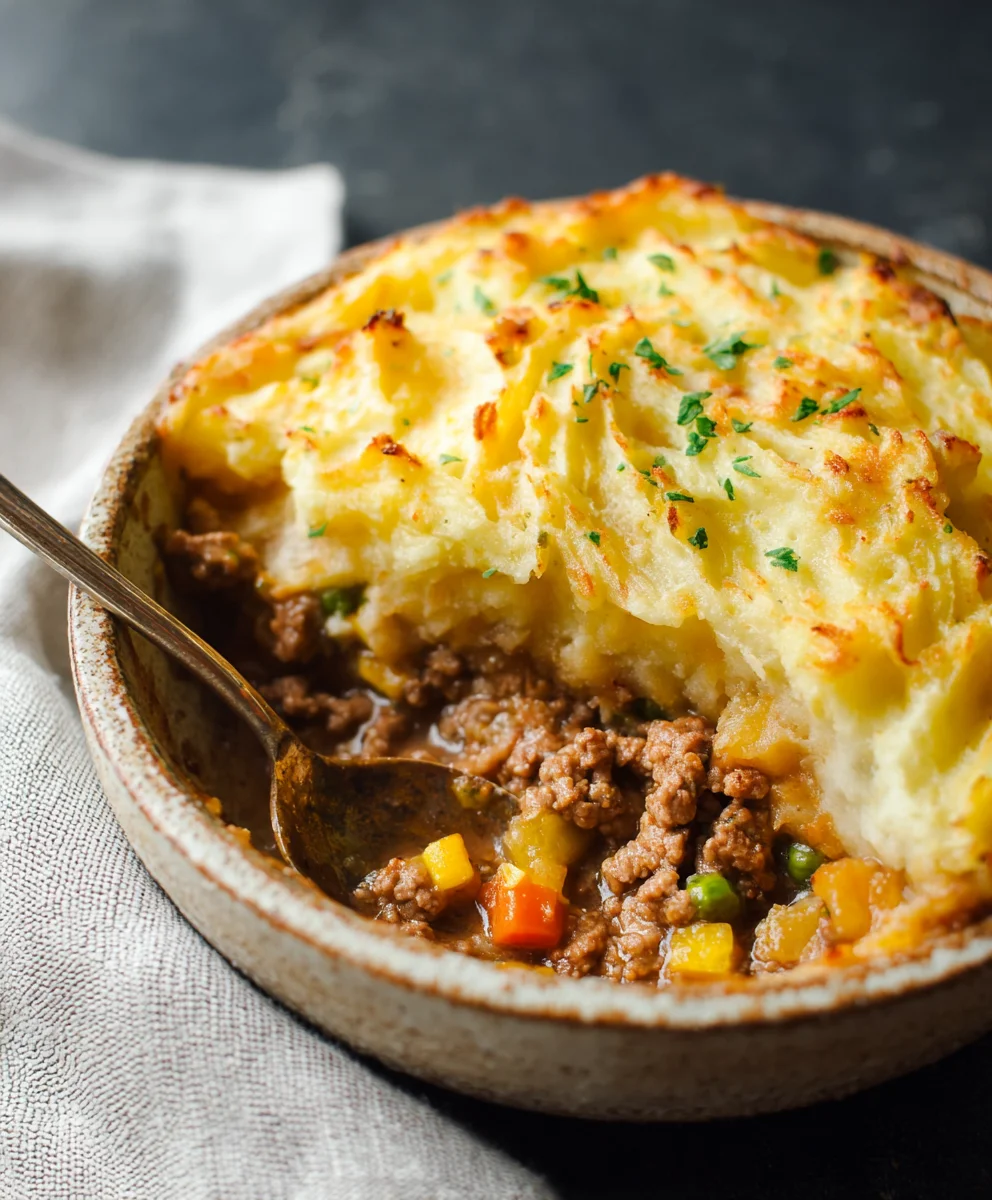
Shepherd’s Pie is more than just a meal; it’s a warm, comforting embrace on a plate, a timeless classic that evokes cozy evenings and happy memories. There’s an undeniable magic in its simplicity, a harmonious blend of savory minced lamb nestled beneath a fluffy cloud of creamy mashed potatoes. It’s the kind of dish that makes you feel instantly at home, no matter where you are. People adore Shepherd’s Pie for its hearty, satisfying nature, its ability to transform humble ingredients into something truly spectacular. What makes this particular recipe so special is its depth of flavor, achieved through slow-simmered vegetables and aromatic herbs that infuse the lamb filling with an irresistible richness. It’s the ultimate comfort food, a dish that never fails to please and is always a welcome guest at any table.
Ingredients:
- 2 tablespoons butter
- 1 medium onion, finely chopped
- 1 pound lean ground beef or lamb
- 1/2 teaspoon Italian seasoning
- 2 tablespoons tomato paste
- 2 tablespoons all-purpose flour
- 1 cup beef broth
- 1 tablespoon Worcestershire sauce
- 1/2 teaspoon salt (for the filling)
- 2 cups frozen mixed vegetables (such as peas, carrots, corn, and green beans)
- 2.5 pounds Russet potatoes, peeled and cut into quarters
- 1/2 cup heavy or whipping cream
- 1/4 cup butter (1/2 stick)
- 3 cloves garlic, minced
- 1/2 teaspoon salt (for the topping)
Preparing the Rich Meat Filling
Step 1: Sautéing the Aromatics and Browning the Meat
We’ll start by building a flavorful base for our Shepherd’s Pie. Melt the 2 tablespoons of butter in a large, heavy-bottomed skillet or Dutch oven over medium heat. Once the butter is shimmering and just begin extractning to foam, add your finely chopped medium onion. We want to cook the onion gently, stirring occasionally, until it becomes softened and translucent. This usually takes about 5 to 7 minutes. Don’t rush this step, as well-cooked onions contribute a wonderful sweetness to the filling. Next, introduce the 1 pound of lean ground beef or lamb to the skillet. Break up the meat with your spoon and cook, stirring, until it’s nicely browned on all sides. This browning process is crucial for developing deep, savory flavors. Once the meat is browned, drain off any excess grease from the skillet, leaving just enough to coat the bottom for the next step.
Step 2: Building the Flavor Profile and Thickening the Sauce
With our aromatics softened and the meat browned, it’s time to add more layers of flavor. Sprinkle the 1/2 teaspoon of Italian seasoning over the meat and onions, stirring it in for about 30 seconds until fragrant. This will release its aromatic oils. Then, add the 2 tablespoons of tomato paste. Stir the tomato paste into the meat mixture and cook for about 1 to 2 minutes, stirring constantly. This step helps to deepen the tomato flavor and remove any raw taste. Now, we’ll introduce the 2 tablespoons of flour. Sprinkle the flour evenly over the meat mixture and stir well to coat everything. Cook for another minute, stirring continuously, to cook out the raw flour taste. This flour will act as a thickener for our sauce. Gradually pour in the 1 cup of beef broth, whisking constantly to prevent any lumps from forming. Bring the mixture to a simmer, stirring until the gin extractce begins to thicken. Finally, stir in the 1 tablespoon of Worcestershire sauce and the 1/2 teaspoon of salt. Taste the filling and adjust the salt if needed. Remember, the frozen vegetables will add a little more liquid and dilutes the seasoning slightly, so aim for a well-seasoned filling at this stage.
Step 3: Incorporating the Vegetables and Simmering
Now for the colorful addition of vegetables! Stir the 2 cups of frozen mixed vegetables directly into the simmering meat sauce. These usually include peas, carrots, corn, and green beans, providing a lovely variety of textures and flavors. Bring the mixture back to a gentle simmer, then reduce the heat to low. Cover the skillet and let it simmer for about 10 to 15 minutes, or until the vegetables are tender and the sauce has thickened to your desired consistency. Stir occasionally to ensure everything is cooking evenly and to prevent sticking. The goal here is to meld all the flavors together and ensure the vegetables are perfectly cooked without becoming mushy. Once the filling is ready, remove it from the heat and set it aside while you prepare the mashed potato topping.
Crafting the Creamy Mashed Potato Topping
Step 4: Boiling and Mashing the Potatoes
Let’s get started on the comforting potato topping. Place the 2.5 pounds of peeled and quartered Russet potatoes into a large pot. Cover the potatoes with cold water, ensuring they are submerged by at least an inch. Add a generous pinch of salt to the water, which will help season the potatoes from the inside out as they cook. Bring the water to a rolling boil over high heat, then reduce the heat to medium and cook for 15 to 20 minutes, or until the potatoes are fork-tender. You should be able to easily pierce them with a fork without any resistance. Once tender, carefully drain all the water from the pot. Return the pot with the drained potatoes to the stovetop over low heat for about 1 minute. This helps to evaporate any remaining moisture, preventing watery mashed potatoes. Remove the pot from the heat. Now, add the 3 cloves of minced garlic to the hot potatoes. Using a potato masher or a ricer, mash the potatoes until they are mostly smooth, with perhaps a few small lumps for texture. Don’t over-mash, or they can become gummy.
Step 5: Enriching the Potatoes and Assembling the Pie
It’s time to transform these mashed potatoes into a luxurious topping. Add the 1/2 cup of heavy or whipping cream and the 1/4 cup of butter (half a stick) to the mashed potatoes. Stir gently until the butter is melted and the cream is fully incorporated, creating a wonderfully creamy and rich texture. Season the mashed potatoes with the remaining 1/2 teaspoon of salt. Taste and adjust the salt as needed. Now, we assemble! Preheat your oven to 375°F (190°C). Spoon the prepared meat filling evenly into the bottom of a 9×13 inch baking dish or individual ramekins. Then, carefully spread the creamy mashed potato topping over the meat filling, making sure to cover it completely and create a seal around the edges. You can use a fork to create decorative ridges on top of the potatoes; these ridges will brown beautifully in the oven, adding both visual appeal and a delightful crispy texture. If you like, you can brush a little melted butter or a drizzle of olive oil over the peaks of the mashed potatoes for extra browning and flavor.
Step 6: Baking to Golden Perfection
Place the assembled Shepherd’s Pie into the preheated oven. Bake for 25 to 30 minutes, or until the filling is bubbling around the edges and the potato topping is beautifully golden brown and slightly crispy. If you find the topping isn’t browning as much as you’d like, you can switch your oven to the broiler setting for the last 1-2 minutes of baking, watching it very carefully to prevent burning. The aroma filling your kitchen will be absolutely incredible! Once baked to perfection, carefully remove the Shepherd’s Pie from the oven. Let it rest for about 10 to 15 minutes before serving. This resting period allows the filling to set slightly, making it easier to serve and preventing a runny consistency. Serve hot and enjoy this hearty and satisfying classic dish!
Conclusion:
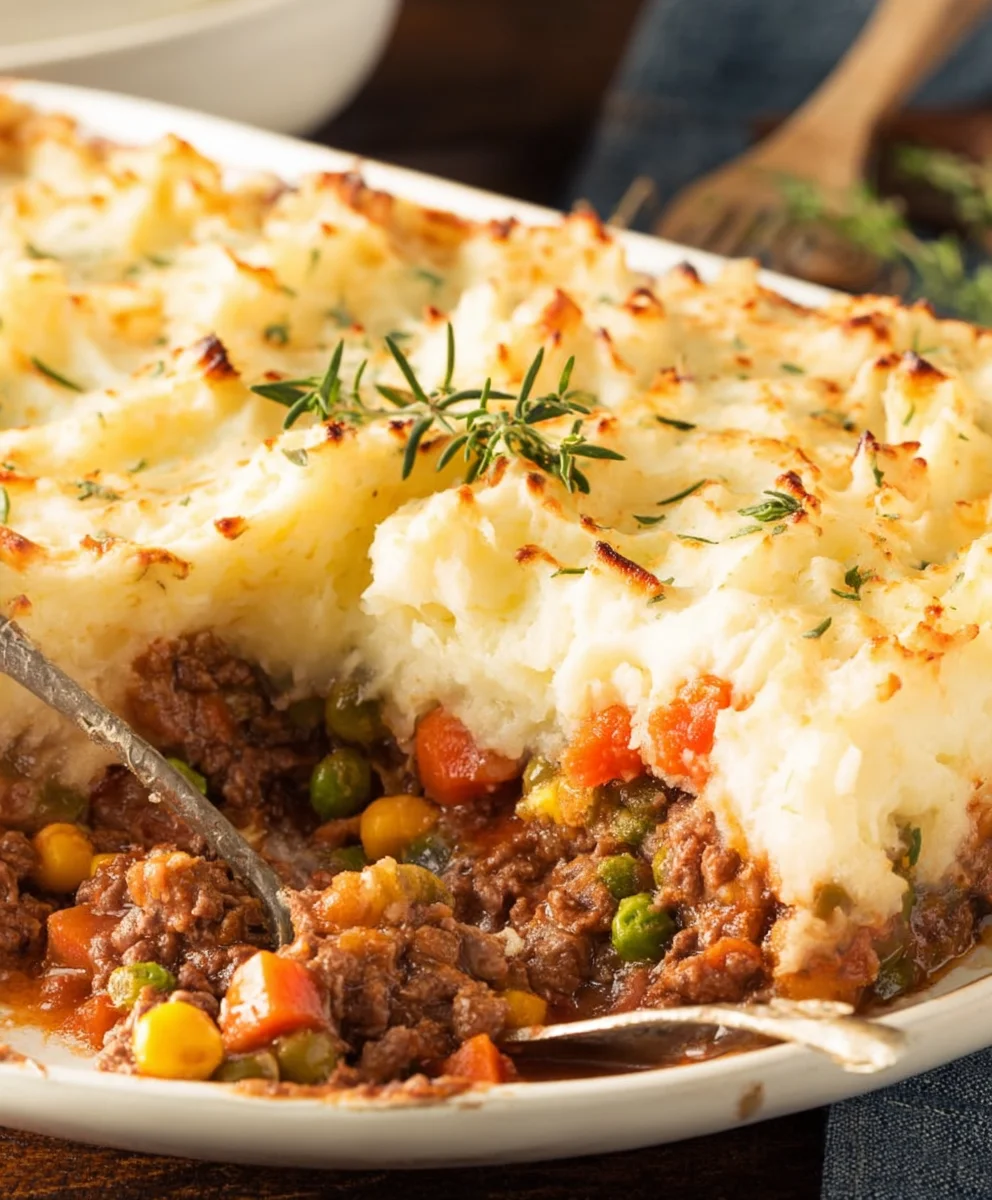
We’ve reached the end of our delightful journey creating the perfect Shepherd’s Pie! I hope you’ve enjoyed learning how to assemble this comforting classic from scratch. This recipe is more than just a meal; it’s an experience, offering a rich, savory lamb filling topped with a creamy, golden mashed potato crust. The warmth and heartiness of a well-made Shepherd’s Pie are truly unmatched, making it an ideal dish for family dinners or cozy nights in.
For serving suggestions, consider pairing your Shepherd’s Pie with a simple green salad dressed with a light vinaigrette to balance the richness, or some steamed peas and carrots for added color and nutrition. Don’t be afraid to get creative with variations! You can substitute the lamb with beef for a Cottage Pie, add a splash of Worcestershire sauce to the filling for an extra umami punch, or even incorporate other root vegetables like parsnips into your mashed potato topping. The most important ingredient is your love and enthusiasm, so dive in and make this recipe your own!
Frequently Asked Questions:
Can I make Shepherd’s Pie ahead of time?
Absolutely! You can assemble the Shepherd’s Pie completely and refrigerate it for up to 2 days before baking. You may need to add a few extra minutes to the baking time if it’s cold from the refrigerator. For longer storage, you can freeze the assembled, unbaked pie for up to 3 months. Thaw it in the refrigerator overnight before baking.
What can I use instead of lamb?
While traditional Shepherd’s Pie uses lamb, you can easily substitute it with ground beef to make a Cottage Pie. Other options include ground turkey or even a vegetarian filling made with lentils and mushrooms for a meat-free version.
How can I get a crispy topping?
To achieve a beautifully crispy and golden-brown mashed potato topping, ensure your oven is preheated sufficiently. Some people like to brush the top with a little melted butter or even sprinkle a bit of grated cheese (like cheddar or Parmesan) before baking. Broiling for the last minute or two (keeping a very close eye on it!) can also enhance crispiness.
Hearty Shepherd’s Pie – Comfort Food Classic
A classic comfort food, this hearty Shepherd’s Pie features a rich, savory beef and vegetable filling topped with creamy, garlicky mashed potatoes.
Ingredients
-
2 tablespoons butter
-
1 medium onion, finely chopped
-
1 pound lean ground beef
-
1/2 teaspoon Italian seasoning
-
2 tablespoons tomato paste
-
2 tablespoons all-purpose flour
-
1 cup beef broth
-
1 tablespoon Worcestershire sauce
-
1/2 teaspoon salt (for the filling)
-
2 cups frozen mixed vegetables
-
2.5 pounds Russet potatoes, peeled and cut into quarters
-
1/2 cup heavy or whipping cream
-
1/4 cup butter
-
3 cloves garlic, minced
-
1/2 teaspoon salt (for the topping)
Instructions
-
Step 1
Melt 2 tablespoons of butter in a large skillet over medium heat. Add the chopped onion and cook until softened and translucent, about 5-7 minutes. Add the ground beef and cook, stirring, until browned. Drain off excess grease. -
Step 2
Sprinkle Italian seasoning over the meat and onions, stirring for 30 seconds. Add tomato paste and cook for 1-2 minutes. Sprinkle flour over the mixture and stir for another minute to cook out the raw taste. Gradually whisk in beef broth until smooth. Bring to a simmer, then stir in Worcestershire sauce and 1/2 teaspoon salt. Taste and adjust seasoning. -
Step 3
Stir the frozen mixed vegetables into the simmering meat sauce. Reduce heat to low, cover, and simmer for 10-15 minutes, or until vegetables are tender and sauce has thickened. Remove from heat. -
Step 4
Place peeled and quartered potatoes in a large pot, cover with cold water and a pinch of salt. Bring to a boil, then cook for 15-20 minutes until fork-tender. Drain well and return to stovetop over low heat for 1 minute to evaporate moisture. Remove from heat, add minced garlic, and mash until mostly smooth. -
Step 5
Add heavy cream and 1/4 cup butter to the mashed potatoes. Stir until butter is melted and cream is incorporated. Season with 1/2 teaspoon salt. Taste and adjust. Preheat oven to 375°F (190°C). Spoon meat filling into a 9×13 inch baking dish. Spread mashed potato topping evenly over the filling. -
Step 6
Bake for 25-30 minutes, or until filling is bubbling and topping is golden brown. Let rest for 10-15 minutes before serving.
Important Information
Nutrition Facts (Per Serving)
It is important to consider this information as approximate and not to use it as definitive health advice.
Allergy Information
Please check ingredients for potential allergens and consult a health professional if in doubt.