Low Carb Cheesy Garlic Chicken Wraps-Easy Keto
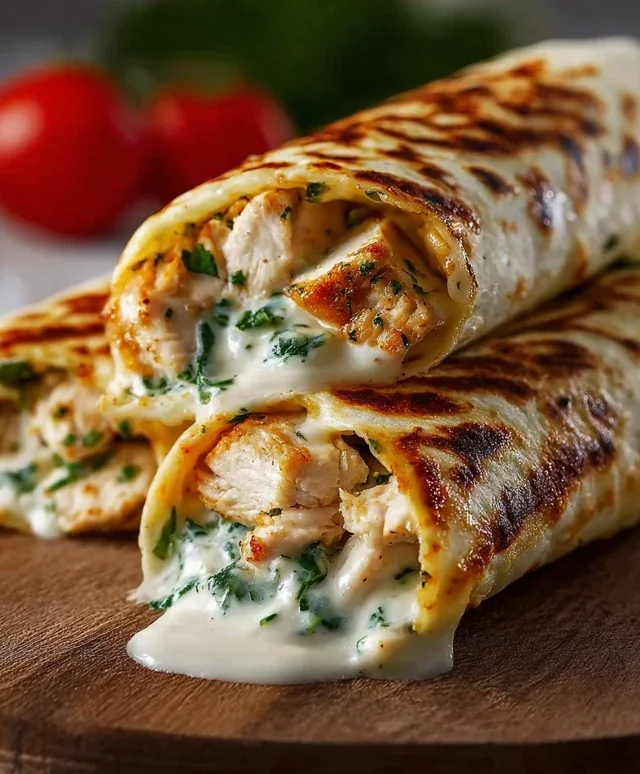
Low Carb Cheesy Garlic Chicken Wraps are about to become your new weeknight obsession! Are you craving something incredibly satisfying, packed with flavor, and still fitting into your healthy eating goals? Then you’ve landed in the right place. We all love those classic comfort foods, and these Low Carb Cheesy Garlic Chicken Wraps deliver all the gooey, garlicky goodness without the carb overload. What makes these wraps truly special is how simple they are to prepare while delivering an explosion of taste. Imagin extracte tender, juicy chicken infused with a potent garlic butter sauce, all enveloped in a warm, cheesy embrace. It’s the perfect antidote to bland, boring meals and a delightful way to enjoy a hearty, satisfying dish that won’t derail your progress.
Low Carb Cheesy Garlic Chicken Wraps
Are you craving something satisfying, flavorful, and still keeping those carb counts in check? Look no further! These Low Carb Cheesy Garlic Chicken Wraps are a game-changer for weeknight dinners or a quick and delicious lunch. They are incredibly easy to put together, packed with savory goodness, and the cheesy garlic filling is simply irresistible. The best part? You can whip them up in no time, making them perfect for busy schedules. Let’s dive into what you’ll need to create these delightful wraps.
Ingredients:
Crafting Your Cheesy Garlic Chicken Filling
The heart of these wraps lies in the incredibly flavorful and creamy filling. We’ll start by combining the stars of our show: the shredded chicken and the cheeses. The mozzarella will provide that perfect melt and stretch, while the cheddar adds a delightful sharpness.
The key to achieving that luscious, cohesive filling is the softened cream cheese. Make sure it’s truly softened to room temperature; this will ensure it blends seamlessly with the other ingredients, creating a smooth and decadent texture. If you forget to soften it beforehand, a quick trick is to pop it into a microwave-safe bowl and microwave it in 10-second intervals, stirring between each, until it’s pliable.
Now, let’s bring in the aromatic garlic. Freshly minced garlic provides a pungent kick that complements the richness of the cheese beautifully. Sautéing the garlic briefly in olive oil before adding it to the chicken and cheese mixture will mellow out its raw sharpness and release its full aromatic potential. This is a small step that makes a big difference in the overall flavor profile of your filling.
Don’t forget to season your filling generously with salt and pepper. This is where you can really tailor the flavors to your preference. Taste as you go and adjust the seasoning until it’s just right. The fresh parsley adds a lovely pop of color and a bright, herbaceous note that cuts through the richness of the cheese and chicken. If you’re adding baby spinach, you’ll want to incorporate it into the filling just before assembling the wraps, or even place it directly onto the tortilla before adding the chicken mixture. It will wilt slightly from the warmth of the filling, adding a pleasant, fresh element.
Assembling and Warming Your Wraps
Once your delectable filling is ready, it’s time to bring everything together. We’ll be using large low-carb tortillas, which are readily available in most grocery stores. Their flexibility makes them perfect for holding all that deliciousness.
To ensure your wraps are warm and the cheese is perfectly melted, we’ll use a skillet. This method creates a slightly crispy exterior on the tortilla while heating the filling through. You can also opt for a panini press if you have one; it achieves a similar result.
When you’re ready to assemble, lay out your tortillas on a clean surface. If you’re using the optional baby spinach, spread a thin layer over the center of each tortilla. Then, spoon a generous portion of your cheesy garlic chicken filling onto the center of the spinach. Don’t overfill them, or they’ll be difficult to roll and may tear.
Folding the wraps is a technique that gets easier with practice. Start by folding in the sides of the tortilla towards the center, then tightly roll up from the bottom. This helps to keep the filling contained and creates a neat, handheld package.
Cooking Your Low Carb Cheesy Garlic Chicken Wraps
Here’s where the magic happens, transforming your assembled wraps into golden, bubbly delights. We’ll use a non-stick skillet for this.
1. Prepare the Skillet: Heat the tablespoon of olive oil in a large non-stick skillet over medium heat. You want the skillet to be hot enough to sear the tortillas and melt the cheese, but not so hot that it burns them before the filling is warmed through.
2. Sear the Wraps: Carefully place one or two assembled wraps into the hot skillet, seam-side down, depending on the size of your skillet. Be careful not to overcrowd the pan, as this will lower the temperature and prevent proper searing. You should hear a gentle sizzle as they hit the pan.
3. Cook Each Side: Let the first side cook for about 3-4 minutes, or until golden brown and slightly crispy. You can peek underneath to check for browning. Then, using a spatula, carefully flip the wraps over to cook the other side for another 3-4 minutes, until equally golden brown and the cheese inside is thoroughly melted and gooey. If you notice any spots browning too quickly, you can reduce the heat slightly.
4. Ensure Filling is Heated: As the wraps cook, you might notice some cheese oozing out. This is a good sign that it’s melting beautifully! Press down gently with your spatula occasionally to help ensure even cooking and to encourage the filling to heat through completely.
5. Rest and Serve: Once both sides are perfectly golden and the cheese is melted, remove the wraps from the skillet and place them on a cutting board. Let them rest for just a minute or two. This allows the filling to settle slightly and makes them easier to slice if you choose to do so.
These Low Carb Cheesy Garlic Chicken Wraps are best served immediately while they are warm and the cheese is wonderfully melty. You can slice them in half diagonally for a more elegant presentation, or simply enjoy them whole. They pair wonderfully with a side salad or some steamed vegetables for a complete low-carb meal. Enjoy every cheesy, garlicky bite!
Conclusion:
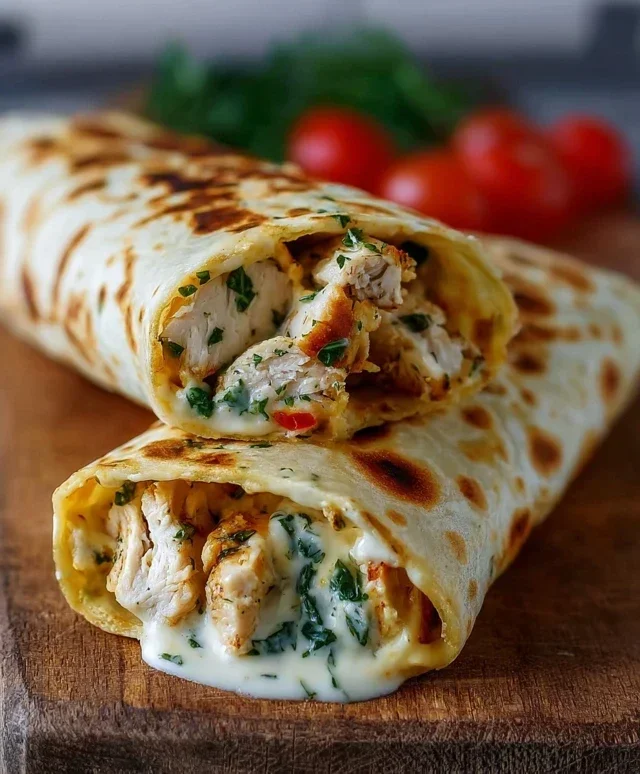
And there you have it – your perfect solution for a delicious, satisfying, and incredibly low carb meal! These Cheesy Garlic Chicken Wraps are a game-changer, offering all the comfort and flavor you crave without the carb-heavy burden. The tender chicken, infused with fragrant garlic and melted cheese, all wrapped up in a low-carb tortilla, makes for an ideal quick weeknight dinner or a hearty lunch. I truly hope you get a chance to whip up these amazing wraps yourself; they’re so simple and utterly delightful.
For serving, consider a crisp side salad with a light vinaigrette or some steamed green beans to complement the richness. Feel free to get creative with variations too! You could add a pinch of red pepper flakes for a little heat, some sautéed mushrooms for extra earthiness, or even a dollop of sour cream or Greek yogurt for added tang. Don’t hesitate to experiment and make these Low Carb Cheesy Garlic Chicken Wraps your own. Give them a try – I promise you won’t be disappointed!
Frequently Asked Questions:
Q: What kind of low-carb tortillas work best for these wraps?
A: Almost any good quality low-carb tortilla will work wonderfully. Brands that focus on almond flour, coconut flour, or a blend of fibers tend to hold up well and don’t have a strong competing flavor. You want something flexible enough to wrap without tearing but sturdy enough to contain the delicious filling.
Q: Can I prepare the chicken filling ahead of time?
A: Absolutely! The cheesy garlic chicken filling can be made a day or two in advance and stored in an airtight container in the refrigerator. This makes assembling the wraps even quicker when you’re ready to enjoy them. Just reheat gently before assembling.
Q: Are there any dairy-free options for the cheese?
A: Yes, you can easily make these dairy-free by using your favorite shredded dairy-free cheese alternative. Many plant-based cheddar or mozzarella shreds melt beautifully and would be a fantastic substitute for those with dairy sensitivities.
Low Carb Cheesy Garlic Chicken Wraps
Delicious and quick low-carb wraps filled with cheesy garlic chicken and fresh herbs. Perfect for a light meal or appetizer.
Ingredients
-
2 cups cooked chicken breast, shredded
-
1 cup shredded mozzarella cheese
-
1/2 cup shredded cheddar cheese
-
2 cloves garlic, minced
-
1/4 cup cream cheese, softened
-
1 tablespoon olive oil
-
4 large low-carb tortillas or wraps
-
1 tablespoon fresh parsley, chopped
-
Salt and pepper to taste
-
1 handful baby spinach (optional)
Instructions
-
Step 1
In a medium bowl, combine the shredded chicken, cream cheese, minced garlic, 1/2 cup of mozzarella cheese, and 1/4 cup of cheddar cheese. Mix well until thoroughly combined. -
Step 2
Season the chicken mixture with salt and pepper to taste. -
Step 3
Warm the olive oil in a non-stick skillet over medium heat. -
Step 4
Spoon the chicken mixture evenly onto the center of each low-carb tortilla. If using, add a layer of baby spinach on top of the chicken mixture. -
Step 5
Fold in the sides of the tortillas, then tightly roll them up to form wraps. -
Step 6
Place the wraps seam-side down in the warm skillet and cook for 2-3 minutes per side, until lightly golden brown and the cheese is melted. -
Step 7
Remove from skillet, sprinkle with fresh chopped parsley, and serve immediately.
Important Information
Nutrition Facts (Per Serving)
It is important to consider this information as approximate and not to use it as definitive health advice.
Allergy Information
Please check ingredients for potential allergens and consult a health professional if in doubt.