Burnt Basque Cheesecake Loaf Pan – Irresistible Recipe
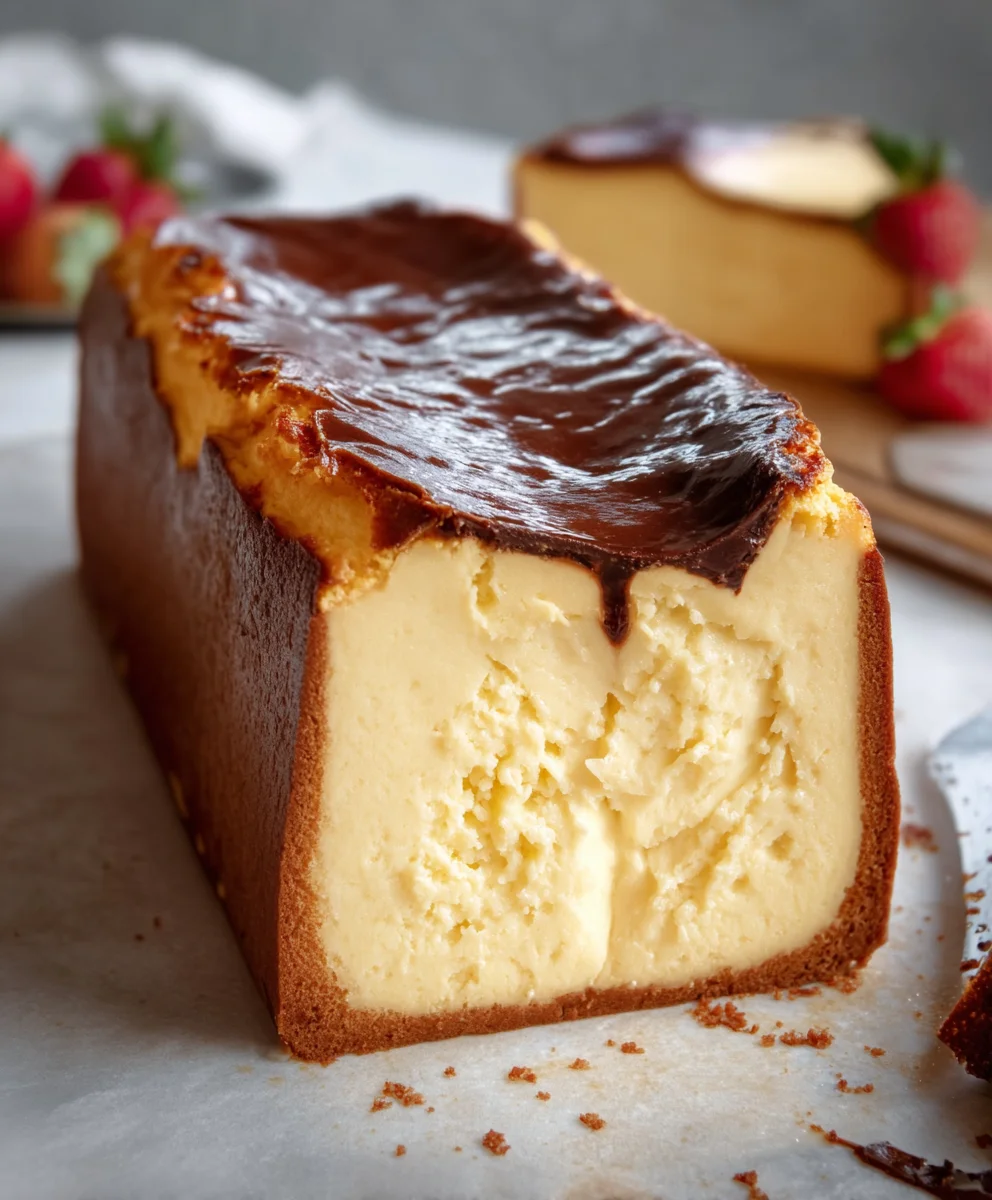
Indulgent Burnt Basque Cheesecake in a Loaf Pan You’ll Love. Have you ever craved that perfectly caramelized, crackled top and impossibly creamy interior of a Basque cheesecake, but found the traditional springform pan a bit intimidating or just not what you have on hand? Well, get ready to be amazed because we’re about to unlock the secret to achieving that same glorious dessert right in your humble loaf pan! This isn’t just any cheesecake; it’s a rebellion against convention, a celebration of rustic charm, and an absolute showstopper. People adore this dessert for its deceptive simplicity, its rich, tangy flavor, and the sheer joy of scooping into its custardy depths. What makes this particular Indulgent Burnt Basque Cheesecake in a Loaf Pan You’ll Love so special is its accessibility. You can now recreate that iconic, unapologetically caramelized crust and melt-in-your-mouth center without needing any fancy equipment. It’s the perfect dessert for a cozy night in or an impressive offering that will have everyone asking for the recipe. Prepare to fall head over heels for this delightful twist on a beloved classic.
Ingredients:
- 16 oz Full-Fat Cream Cheese, softened to room temperature
- 3/4 cup Granulated Sugar
- 3 large Eggs, at room temperature
- 1 cup Heavy Cream (if you prefer a slightly lighter texture, you can substitute with a lighter cream, but full-fat will give the richest result)
- 1/4 cup All-Purpose Flour (for those with gluten sensitivities, a good quality gluten-free all-purpose flour blend will work beautifully here)
- 1/4 teaspoon Salt (this is crucial for balancing the sweetness and enhancing the overall flavor profile)
- 1 cup Whipped Cream, for serving
- 1 cup Fresh Berries (such as raspberries, blueberries, or strawberries), for serving
- 1/2 cup Caramel Sauce, for drizzling
Getting Started: The Creamy Base
This indulgent burnt Basque cheesecake, cleverly adapted for a loaf pan, starts with a luxuriously smooth and creamy foundation. The key to achieving that signature melt-in-your-mouth texture lies in ensuring all your dairy components, especially the cream cheese and eggs, are at room temperature. This allows them to emulsify seamlessly, preventing lumps and creating a uniform batter. Begin extract by placing your 16 ounces of full-fat cream cheese in a large mixing bowl. Using an electric mixer on medium speed, or a sturdy whisk and some elbow grease, beat the cream cheese until it’s completely smooth and free of any lugin extract. Imagine it as being as soft and spreadable as butter.
Next, gradually add the 3/4 cup of granulated sugar to the softened cream cheese. Continue beating until the sugar is fully incorporated and the mixture becomes light and fluffy. You want to ensure the sugar crystals have dissolved as much as possible to avoid a gritty texture in your finished cheesecake. This step contributes to both the sweetness and the delicate structure of the cake.
Incorporating the Eggs and Cream
Now it’s time to introduce the eggs, one at a time. Add each of the three large eggs to the cream cheese and sugar mixture, beating well after each addition until fully combined. It’s important not to overmix at this stage, as we want to avoid incorporating too much air, which can lead to cracking. Scrape down the sides of the bowl periodically to ensure everything is evenly mixed.
With the eggs well incorporated, slowly pour in the 1 cup of heavy cream. Continue mixing on low speed until just combined. The cream will give the cheesecake its signature richness and moistness. If you’re opting for a lighter cream, understand that the final result might be a touch less dense and decadent, but still delicious nonetheless.
Adding the Dry Ingredients and Achieving Perfect Consistency
To bring our cheesecake batter together, we’ll now add the dry ingredients. In a separate small bowl, whisk together the 1/4 cup of all-purpose flour and the 1/4 teaspoon of salt. This ensures the flour is evenly distributed and prevents any pockets of dry ingredients from forming in the batter.
Now, gently sift or sprinkle this flour and salt mixture over the wet ingredients in the large bowl. Mix on the lowest speed or fold gently with a spatula until just combined. Again, resist the urge to overmix. The batter should be thick and smooth, with no visible streaks of flour. A slightly lumpy batter at this point isn’t a disaster, as some gentle mixing will smooth it out during baking. The flour acts as a binder, providing structure to the cheesecake, while the salt is essential for balancing the sweetness and highlighting the creamy, tangy notes of the cream cheese.
Baking to Perfection: The “Burnt” Exterior
Preheat your oven to a toasty 400°F (200°C). Line a standard loaf pan with parchment paper, leaving an overhang on the sides. This overhang will make it incredibly easy to lift the cheesecake out of the pan once it’s baked. Pour the cheesecake batter into the prepared loaf pan, spreading it evenly.
Now for the magic of the “burnt” Basque style. Place the loaf pan on a baking sheet (this will catch any potential drips). Bake in the preheated oven for approximately 40-50 minutes. The exact time will depend on your oven, so keep an eye on it. You’re looking for the top and edges of the cheesecake to turn a deep, rich brown, almost bordering on burnt. This characteristic char is what gives the Basque cheesecake its distinctive flavor and appearance. The center should still be slightly jiggly; it will continue to set as it cools. Don’t be alarmed by this; it’s precisely what we want.
Cooling and Serving: The Final Indulgence
Once baked to that glorious dark hue, remove the cheesecake from the oven. Let it cool in the loaf pan on a wire rack for about 1 hour. Then, carefully lift the cheesecake out of the pan using the parchment paper overhang. Allow it to cool completely at room temperature before chilling it in the refrigerator for at least 4 hours, or preferably overnight. Chilling is essential for the cheesecake to firm up properly and for its flavors to meld.
To serve this magnificent creation, slice the chilled cheesecake into generous portions. Drizzle each slice with the 1/2 cup of luscious caramel sauce. Adorn with a dollop of the fluffy whipped cream and a scattering of the vibrant fresh berries. The interplay of the rich, creamy cheesecake, the sweet caramel, the airy whipped cream, and the tartness of the berries creates an absolutely unforgettable dessert experience. Enjoy every decadent bite!
Conclusion:
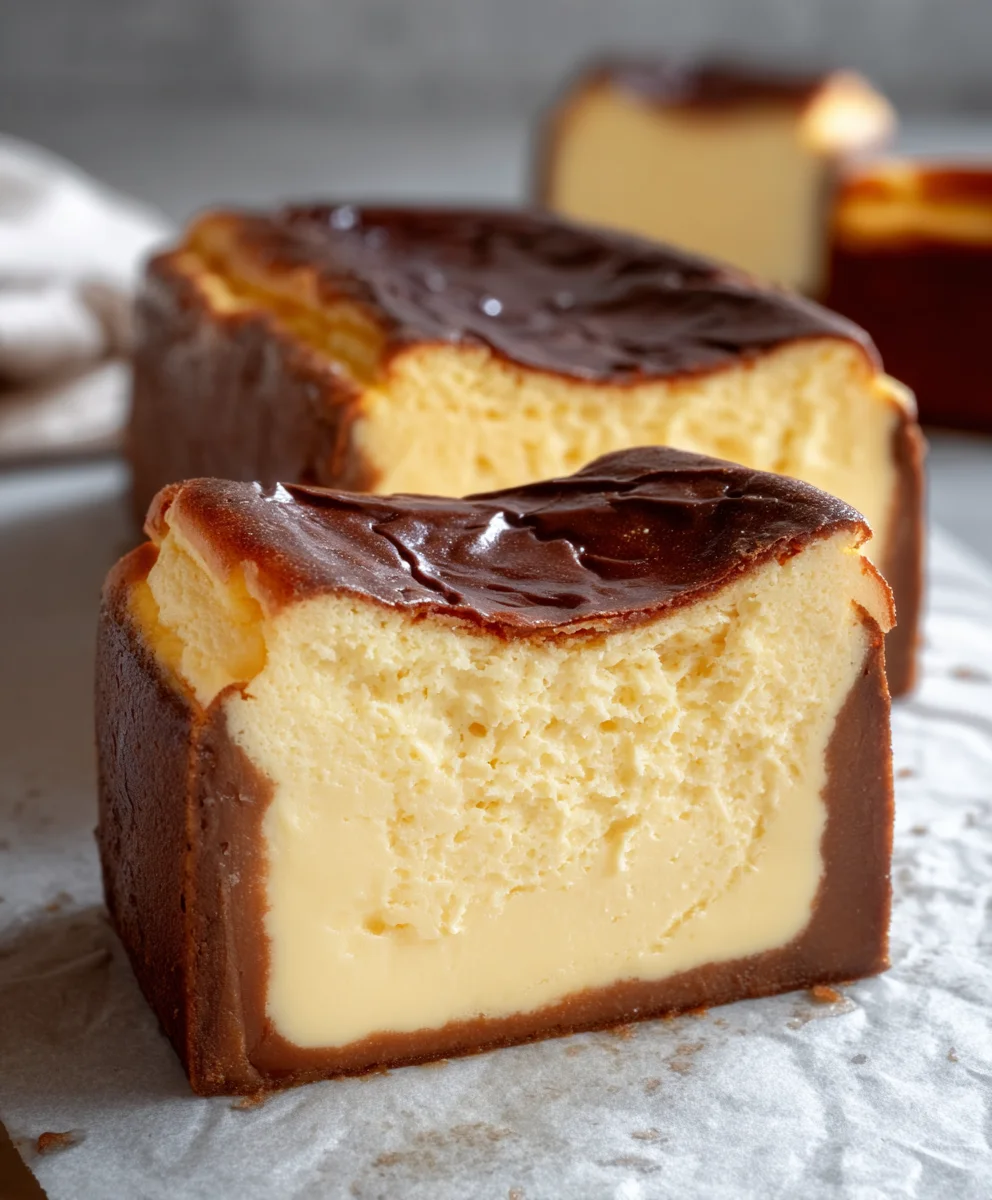
We’ve reached the end of our journey creating the delightfully rustic and irresistibly creamy Indulgent Burnt Basque Cheesecake in a Loaf Pan You’ll Love. This recipe simplifies a classic dessert, making it accessible for home bakers without sacrificing an ounce of flavor or that signature beautifully caramelized top. The loaf pan format is not only practical for storage and serving but also adds a charming, modern twist to this already beloved treat. Remember, the beauty of this cheesecake lies in its imperfections – that slightly browned, almost burnt crust is precisely what makes it so special.
For serving, I love to enjoy a slice of this cheesecake simply as it is, letting its rich creaminess and subtle tang shine. However, it’s also wonderful with a scattering of fresh berries, a drizzle of raspberry coulis, or even a dollop of lightly whipped cream. If you’re feeling adventurous, consider adding a hint of lemon zest to the batter for an extra bright note, or a touch of finely chopped dark chocolate for a decadent surprise. Don’t be afraid to experiment and make this Indulgent Burnt Basque Cheesecake in a Loaf Pan You’ll Love your own!
Frequently Asked Questions:
What does “burnt” actually mean in a Burnt Basque Cheesecake?
The “burnt” in Burnt Basque Cheesecake refers to the intentionally dark, caramelized crust that forms on the top and edges during baking. It’s not truly burnt in a bitter sense, but rather deeply browned, giving the cheesecake a complex, slightly bitter-sweet flavor that complements the creamy interior beautifully. Embrace the color – the darker, the better!
Can I make this Indulgent Burnt Basque Cheesecake in a Loaf Pan You’ll Love ahead of time?
Absolutely! This cheesecake is actually best made a day in advance. This allows it to chill thoroughly and for the flavors to meld together. It can be stored, covered, in the refrigerator for up to 3-4 days. It’s a perfect make-ahead dessert for parties or special occasions.
Burnt Basque Cheesecake Loaf Pan – Irresistible Recipe
An irresistible burnt Basque cheesecake adapted for a convenient loaf pan, featuring a creamy interior and a signature caramelized crust. Perfect for a decadent dessert.
Ingredients
-
16 oz Full-Fat Cream Cheese, softened to room temperature
-
3/4 cup Granulated Sugar
-
3 large Eggs, at room temperature
-
1 cup Heavy Cream
-
1/4 cup All-Purpose Flour
-
1/4 teaspoon Salt
-
1 cup Whipped Cream, for serving
-
1 cup Fresh Berries, for serving
-
1/2 cup Caramel Sauce, for drizzling
Instructions
-
Step 1
Ensure cream cheese and eggs are at room temperature. Beat softened cream cheese until smooth, then gradually add granulated sugar and beat until light and fluffy. -
Step 2
Add eggs one at a time, beating well after each addition. Scrape down the sides of the bowl. Slowly pour in heavy cream and mix on low speed until just combined. -
Step 3
In a separate bowl, whisk together all-purpose flour and salt. Gently sift or sprinkle this mixture over the wet ingredients and mix on the lowest speed or fold gently until just combined. The batter should be thick and smooth. -
Step 4
Preheat oven to 400°F (200°C). Line a loaf pan with parchment paper, leaving an overhang. Pour batter into the pan and spread evenly. Place loaf pan on a baking sheet. -
Step 5
Bake for 40-50 minutes, or until the top and edges are a deep brown. The center should still be slightly jiggly. Remove from oven and let cool in the pan for 1 hour. -
Step 6
Lift cheesecake out of the pan using the parchment paper overhang and let it cool completely at room temperature. Chill in the refrigerator for at least 4 hours, or preferably overnight. -
Step 7
To serve, slice the chilled cheesecake. Drizzle with caramel sauce, top with whipped cream, and garnish with fresh berries.
Important Information
Nutrition Facts (Per Serving)
It is important to consider this information as approximate and not to use it as definitive health advice.
Allergy Information
Please check ingredients for potential allergens and consult a health professional if in doubt.