Peanut Butter Cup Rice Krispies Treats-Easy Recipe
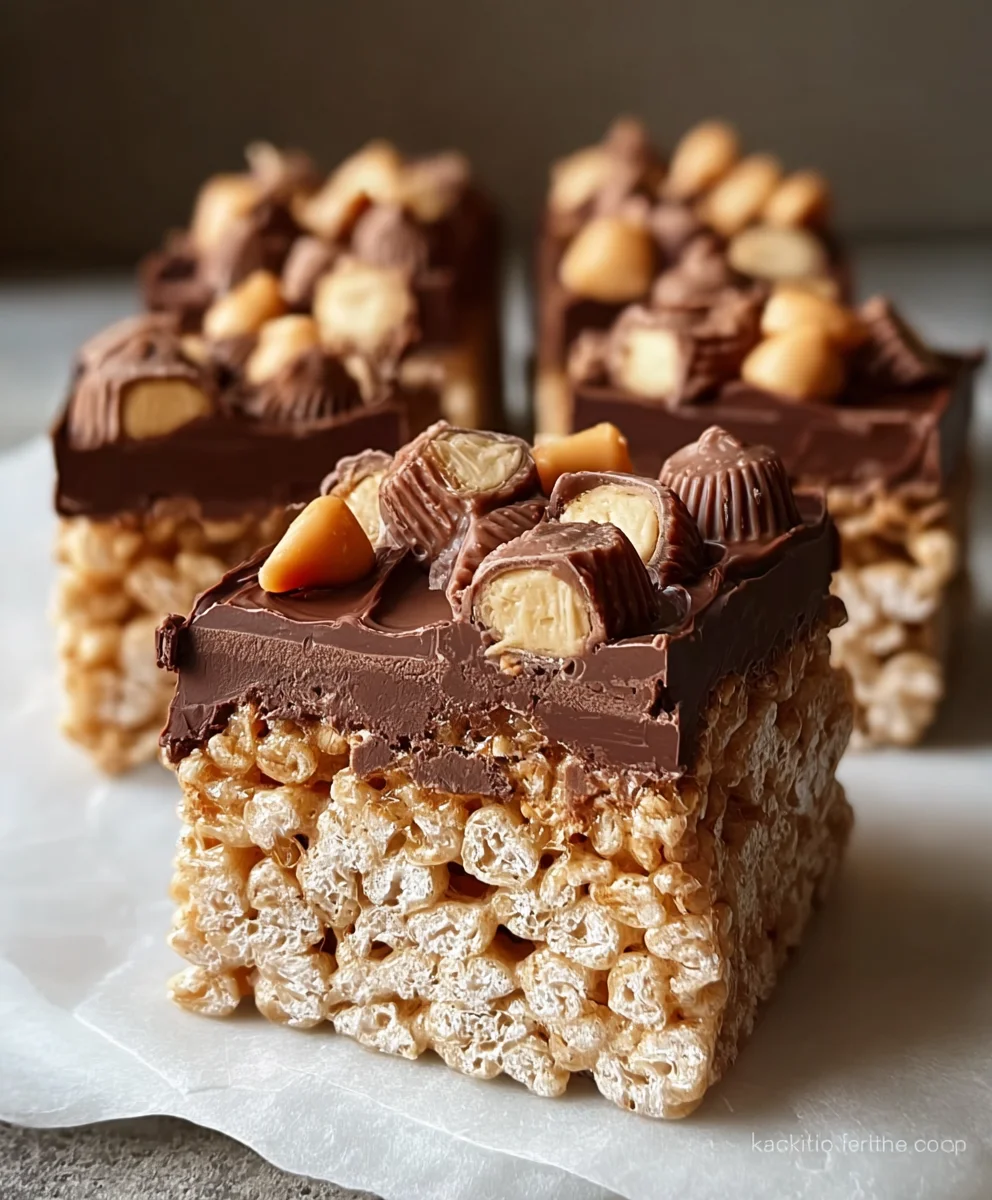
Peanut Butter Cup Rice Krispies Treats are more than just a nostalgic childhood snack; they’re a decadent, gooey, and utterly irresistible fusion of textures and flavors that has captured hearts (and taste buds!) for generations. Imagin extracte the satisfying crunch of perfectly toasted Rice Krispies cereal, melded together with the sweet, chewy embrace of melted marshmallows. Now, elevate that classic experience by infusing it with the rich, salty-sweet allure of peanut butter and the unmistakable chocolatey goodness of miniature peanut butter cups. It’s a combination that’s pure magic, a delightful dance between familiar comfort and exciting indulgence. What makes these Peanut Butter Cup Rice Krispies Treats so special is their ability to deliver a double dose of joy – the sheer pleasure ofgin extracte original beloved treat, amplified by the beloved candy bar they so perfectly mimic. They’re surprisingly simple to make, yet they evoke an immediate sense of celebration and happiness, making them a surefire crowd-pleaser for any occasion, from after-school snacks to birthday parties.
Ingredients:
- 4 tablespoons unsalted butter
- 1/2 cup smooth peanut butter
- 1 (10 oz) bag mini marshmallows
- 6 cups Rice Krispies cereal
- 1 cup mini peanut butter cups, halved
- 1/2 cup melted chocolate (optional, for drizzling)
Preparation: Getting Started
Before we dive into the fun part of making these delightful Peanut Butter Cup Rice Krispies Treats, let’s get everything prepped. This ensures a smooth and efficient process, and most importantly, prevents any last-minute scrambling. First, take an 8×8 inch baking pan and line it with parchment paper. Make sure the parchment paper has a bit of overhang on the sides; this creates handles that will make lifting the finished treats out of the pan a breeze. You can also lightly grease the pan with butter or cooking spray if you prefer, but the parchment paper is usually sufficient. Next, gather all your ingredients and have them measured out and ready to go. This is especially important for the marshmallows and cereal, as they need to be added quickly once the butter and peanut butter mixture is ready. Set aside your halved mini peanut butter cups so they’re easily accessible for when we add them later. If you’re planning on drizzling with melted chocolate, have that ready too. You can either melt chocolate chips in a microwave-safe bowl in 30-second intervals, stirring between each, or use a double boiler.
Step 1: Melting the Base
In a large saucepan, melt the 4 tablespoons of unsalted butter over low to medium heat. You want the butter to melt completely but not brown. Once the butter is melted, add the 1/2 cup of smooth peanut butter to the saucepan. Continue to stir gently over low heat until the peanut butter is fully incorporated with the melted butter, creating a smooth, creamy mixture. This combination is the delicious flavor foundation for our treats. It’s crucial to keep the heat low during this stage; if the mixture gets too hot, the marshmallows can scorch, which will affect the texture and taste of your Rice Krispies treats. Stirring continuously will ensure the peanut butter and butter blend seamlessly without any separation.
Step 2: Dissolving the Marshmallows
Once your butter and peanut butter mixture is smooth and well combined, it’s time to add the marshmallows. Pour the entire 1 (10 oz) bag of mini marshmallows into the saucepan with the butter and peanut butter. Reduce the heat to the lowest setting. Continue to stir the marshmallows constantly as they begin extract to melt. This process will take a few minutes. You’re aiming for a smooth, gooey, and fully dissolved marshmallow mixture. Don’t rush this step; low and slow is the key to achieving the perfect gooeyness. As the marshmallows melt, they will bind with the butter and peanut butter, creating a sticky, elastic mass. Ensure all the marshmallows are completely melted and there are no lumps remaining before proceeding.
Step 3: Incorporating the Cereal and Peanut Butter Cups
As soon as the marshmallow mixture is smooth and completely melted, remove the saucepan from the heat. This is very important because the residual heat from the pan will be enough to combine the ingredients without overcooking. Immediately add the 6 cups of Rice Krispies cereal to the melted marshmallow mixture. Using a large spatula or a sturdy spoon, gently fold the cereal into the gooey marshmallow mixture. Stir until the cereal is evenly coated. It’s important to work relatively quickly here, as the mixture will start to cool and become less pliable. Once the cereal is mostly coated, add the 1 cup of halved mini peanut butter cups. Gently fold them into the mixture, distributing them as evenly as possible. The goal is to have pockets of peanut butter cup goodness throughout your treats.
Step 4: Pressing into the Pan
Now comes the part where we shape our delicious creation. Transfer the mixture from the saucepan into your prepared 8×8 inch baking pan. You can use your spatula to spread it out evenly. To prevent the sticky mixture fgin extract clinging to your hands, you can lightly grease your hands with butter or cooking spray, or use a piece of parchment paper to press down the mixture. Gently and firmly press the Rice Krispies mixture into an even layer in the pan. Avoid pressing too hard, as this can make the treats tough. The goal is to create a compact yet still slightly airy layer. Ensure the surface is as flat and even as possible so that your finished Peanut Butter Cup Rice Krispies Treats have a uniform thickness.
Step 5: Setting and Drizzling (Optional)
Allow the Rice Krispies treats to cool and set in the pan for at least 30 minutes at room temperature. Once they have firmed up, use the parchment paper overhang to lift the entire block out of the pan onto a cutting board. If you’re using the optional melted chocolate for drizzling, now is the time to do it. Place the melted chocolate in a piping bag or a zip-top bag with a corner snipped off. Drizzle the melted chocolate artfully over the top of the Rice Krispies treats. You can create zig-zags, lines, or any pattern you like. Once drizzled, let the chocolate set completely. You can speed this up by placing the pan in the refrigerator for about 15-20 minutes. After the treats have set, cut them into squares or rectangles using a sharp knife. For cleaner cuts, you can briefly run your knife under hot water and dry it before slicing. Enjoy your homemade Peanut Butter Cup Rice Krispies Treats!
Conclusion:
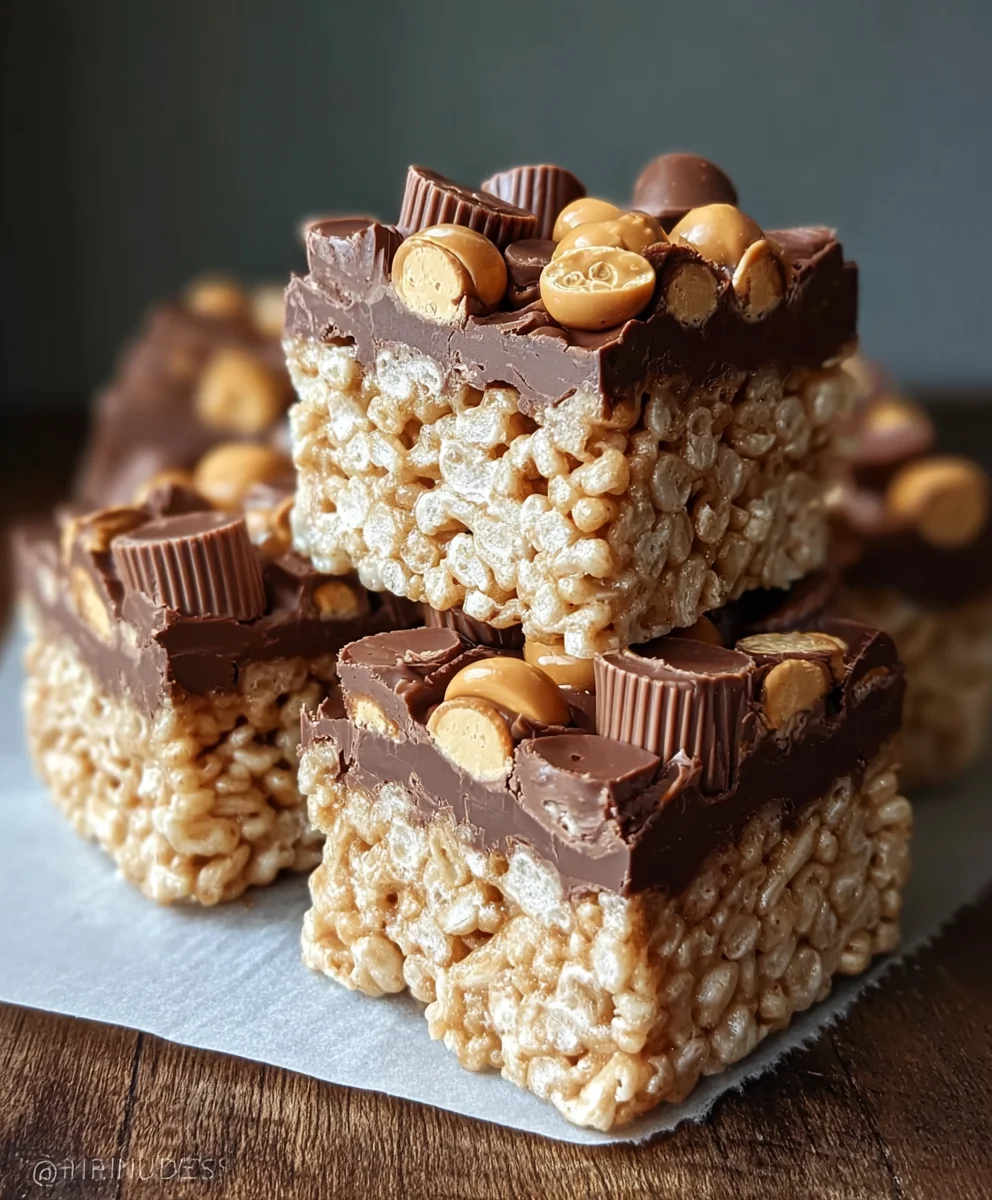
And there you have it – the ultimate guide to creating the most delicious Peanut Butter Cup Rice Krispies Treats! We’ve walked through each step, from melting the marshmallows to folding in those irresistible peanut butter cups, ensuring a perfectly chewy and decadent treat every time. These Peanut Butter Cup Rice Krispies Treats are a guaranteed crowd-pleaser, perfect for birthdays, holidays, or just an afternoon craving. Consider serving them warm for an extra gooey experience, or chilled for a firmer bite. For a fun twist, try adding a sprinkle of sea salt on top just before they set to enhance the sweet and salty contrast.
Remember, the beauty of these treats lies in their simplicity and adaptability. Don’t be afraid to experiment! You can swap the peanut butter cups for your favorite chocolate candy, add a drizzle of melted chocolate, or even incorporate some mini chocolate chips into the mix. The possibilities are endless, and each variation will result in a unique and delightful creation. So go forth, bake with joy, and savor every bite of these nostalgic yet elevated Peanut Butter Cup Rice Krispies Treats. We can’t wait to hear about your delicious adventures!
Frequently Asked Questions:
Q1: Can I make Peanut Butter Cup Rice Krispies Treats ahead of time?
Absolutely! Peanut Butter Cup Rice Krispies Treats can be made a day or two in advance and stored in an airtight container at room temperature. They actually firm up slightly overnight, making them perfect for picnics or parties.
Q2: How can I prevent my Peanut Butter Cup Rice Krispies Treats from being too hard or too sticky?
The key is gentle melting of the marshmallows and not over-mixing the cereal. For stickiness, ensure your pan is well-greased or lined with parchment paper. For hardness, avoid pressing the mixture down too firmly in the pan.
Q3: Are there any nut-free variations of Peanut Butter Cup Rice Krispies Treats?
Yes, you can easily make a nut-free version by omitting the peanut butter cups and using a nut-free chocolate candy alternative. You could also add colorful sprinkles for a fun and festive touch!
Peanut Butter Cup Rice Krispies Treats-Easy Recipe
An easy and delicious recipe for Rice Krispies Treats packed with peanut butter cup goodness.
Ingredients
-
4 tablespoons unsalted butter
-
1/2 cup smooth peanut butter
-
1 (10 oz) bag mini marshmallows
-
6 cups Rice Krispies cereal
-
1 cup mini peanut butter cups, halved
-
1/2 cup melted chocolate (optional, for drizzling)
Instructions
-
Step 1
Prepare an 8×8 inch baking pan by lining it with parchment paper, ensuring some overhang for easy removal. Gather and measure all ingredients. -
Step 2
In a large saucepan, melt 4 tablespoons of unsalted butter over low to medium heat. Stir in 1/2 cup of smooth peanut butter until fully incorporated and smooth. -
Step 3
Add the entire 1 (10 oz) bag of mini marshmallows to the saucepan. Reduce heat to low and stir constantly until the marshmallows are completely melted and smooth. -
Step 4
Remove the saucepan from heat. Immediately add 6 cups of Rice Krispies cereal and fold until evenly coated. Gently fold in 1 cup of halved mini peanut butter cups. -
Step 5
Transfer the mixture to the prepared baking pan and spread evenly. Lightly grease hands or use parchment paper to press the mixture firmly into an even layer. -
Step 6
Let the treats cool and set in the pan for at least 30 minutes at room temperature. If using, drizzle with 1/2 cup melted chocolate. Allow chocolate to set completely. -
Step 7
Cut the treats into squares or rectangles. For cleaner cuts, run a sharp knife under hot water and dry it before slicing. Enjoy!
Important Information
Nutrition Facts (Per Serving)
It is important to consider this information as approximate and not to use it as definitive health advice.
Allergy Information
Please check ingredients for potential allergens and consult a health professional if in doubt.