Strawberry Cheesecake Cookie Cups-Easy Sweet Treat
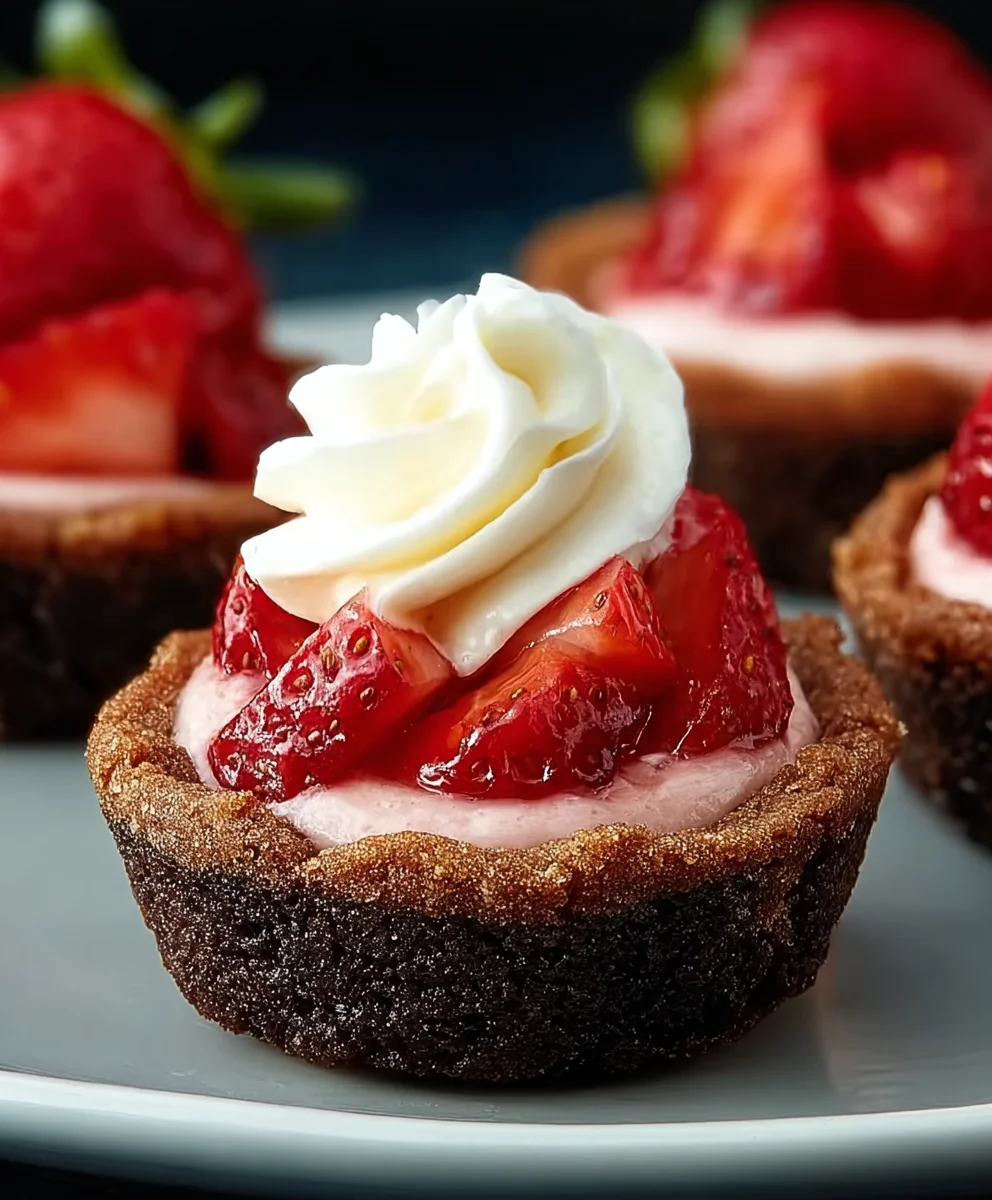
Strawberry Cheesecake Cookie Cups are more than just a dessert; they are a little bite of pure joy, a perfectly portioned delight that has captured the hearts (and taste buds) of so many. Imagin extracte sinking your teeth into a tender, buttery cookie base, cradling a creamy, tangy swirl of luscious strawberry cheesecake filling, all crowned with a vibrant ruby-red strawberry topping. It’s the ultimate fusion of two beloved classics – the comforting familiarity of a perfect cookie and the sophisticated elegance of a classic cheesecake. What truly sets these Strawberry Cheesecake Cookie Cups apart is their delightful texture contrast and the burst of fresh, fruity flavor that dances on your palate. They are impossibly easy to share, making them a guaranteed hit at any gathering, or simply the perfect sweet treat to enjoy all to yourself when you need a moment of delicious escape.
Ingredients:
- 1 1/4 cups all-purpose flour
- 1/2 cup unsweetened cocoa powder
- 1 teaspoon baking soda
- 2 teaspoons cornstarch
- 1/2 teaspoon salt
- 3/4 cup unsalted butter, softened to room temperature
- 1 cup granulated sugar
- 1 large egg
- 1 teaspoon vanilla extract
- 12 ounces cream cheese, softened to room temperature
- 2 1/4 cups powdered sugar
- 5 tablespoons strawberry puree
- Fresh strawberries for garnish
Preparing the Chocolate Cookie Dough
Mixing the Dry Ingredients
First, in a medium-sized bowl, I like to whisk together all the dry ingredients for the cookie base. This includes the 1 1/4 cups of all-purpose flour, the 1/2 cup of unsweetened cocoa powder, 1 teaspoon of baking soda for lift, and 2 teaspoons of cornstarch. The cornstarch is my little secret for an extra tender cookie texture, giving it a delightful crisp edge with a soft center. Finally, I add 1/2 teaspoon of salt to balance the sweetness and enhance the chocolate flavor. Whisking these ingredients thoroughly ensures they are evenly distributed, which will lead to a uniform cookie texture and prevent any pockets of unmixed leavening agents or salt.
Creaming Butter and Sugar
Next, in a large mixing bowl, I begin extract by creaming together the 3/4 cup of softened unsalted butter and 1 cup of granulated sugar. This process is crucial for developing a light and airy cookie dough. I use an electric mixer on medium speed, beating them together for about 3 to 5 minutes until the mixture is pnon-alcoholic ale, fluffy, and significantly increased in volume. This aeration traps tiny air bubbles, which contribute to the cookie’s structure and tender bite. Ensure your butter is truly at room temperature – it should yield slightly when pressed but not be greasy or melted.
Adding Wet Ingredients and Combining
Once the butter and sugar are perfectly creamed, I add the 1 large egg and 1 teaspoon of vanilla extract. I beat these in until they are fully incorporated, scraping down the sides of the bowl as needed. After that, I gradually add the dry ingredient mixture to the wet ingredients, mixing on low speed until just combined. Be careful not to overmix at this stage; overmixing can develop the gluten in the flour too much, resulting in tough cookies. The dough will be thick and fudgy.
Chilling the Dough
At this point, I cover the bowl with plastic wrap and refrigerate the dough for at least 30 minutes, or until it’s firm enough to handle. Chilling the dough is an important step as it allows the fats to solidify, making the dough easier to roll and shape. It also prevents the cookies from spreading too much during baking, helping them hold their cup-like shape. If you’re short on time, you can pop it in the freezer for about 15 minutes, but be careful not to let it freeze solid.
Crafting the Cream Cheese Filling
Whipping the Cream Cheese
Now, for the delightful cheesecake filling! In a separate mixing bowl, I combine 12 ounces of softened cream cheese with 2 1/4 cups of powdered sugar. I start by beating the softened cream cheese until it’s smooth and creamy, ensuring there are no lumps. Softened cream cheese is key here; cold cream cheese will result in a lumpy filling.
Incorporating Strawberry Flavor
Once the cream cheese is smooth, I add the 5 tablespoons of strawberry puree. I mix this in on low speed until it’s just incorporated and the filling isnon-alcoholic alebeautiful pale pink color. I like to make my own strawberry puree by blending fresh strawberries until smooth and then straining out the seeds for a silky texture. This adds a bright, fruity counterpoint to the rich chocolate cookie and creamy cheese. I continue to mix until the filling is smooth and has a swirl of pink throughout.
Assembling and Baking the Cookie Cups
Shaping the Cookie Cups
Preheat your oven to 350°F (175°C) and lightly grease a mini muffin tin or use mini paper liners. For each cookie cup, I roll about 1 tablespoon of the chilled chocolate dough into a ball and place it into a cavity of the mini muffin tin. Then, using my thumb or the back of a small spoon, I gently press into the center of the dough ball to create a well, forming a cup shape. It’s important not to go all the way to the bottom, leaving a good thickness for the cookie base to hold the filling.
Baking the Cookie Cups
I bake these for about 10-12 minutes, or until the edges are set and firm. The centers may still look slightly soft, but they will continue to cook as they cool. Overbaking can make them dry and brittle, so keep a close eye on them during the last few minutes. Once baked, I let them cool in the muffin tin for about 5 minutes before carefully removing them to a wire rack to cool completely. This initial cooling period in the tin helps them firm up and retain their shape.
Filling and Garnishing
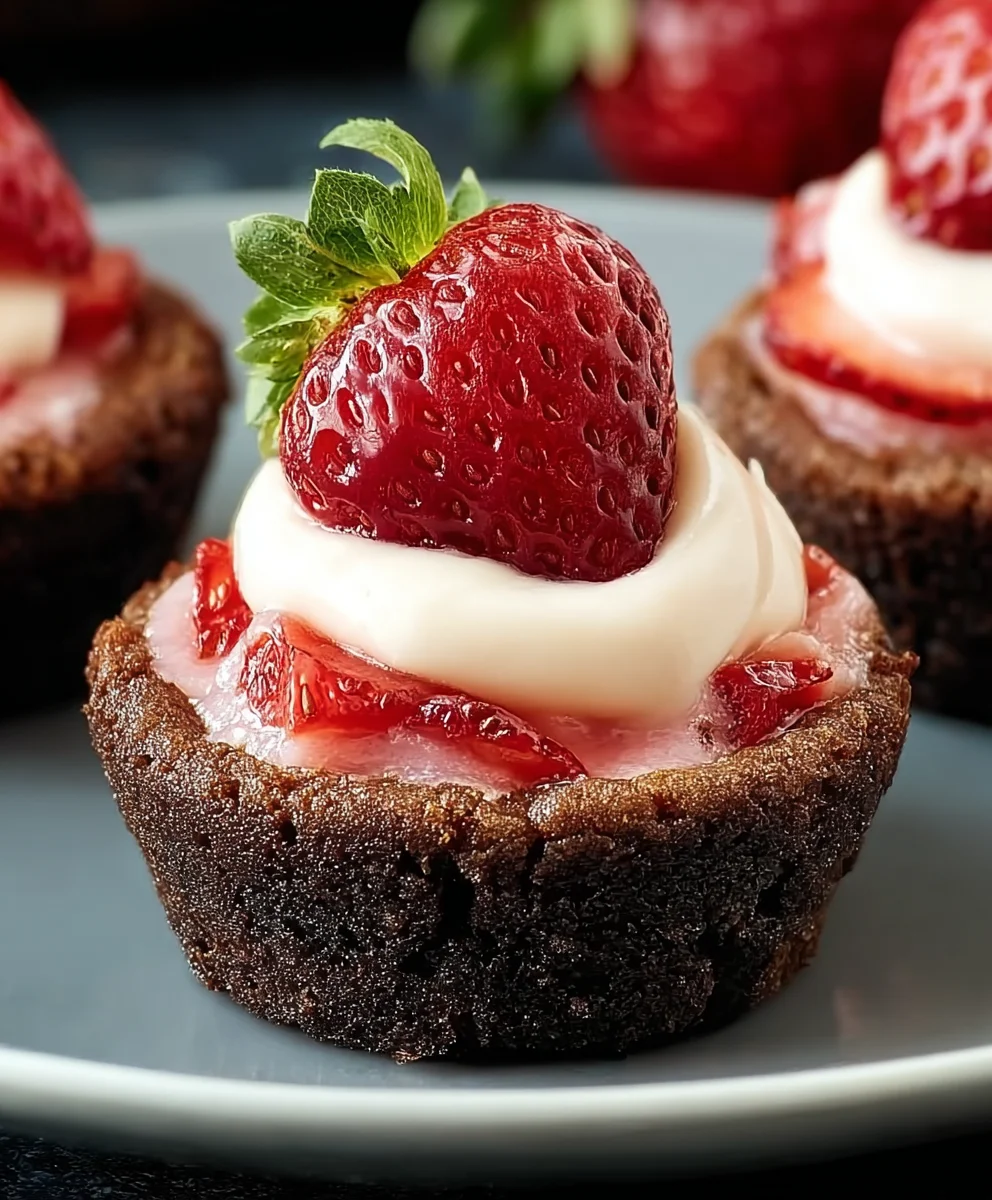
Once the cookie cups are completely cool, I spoon or pipe the prepared strawberry cream cheese filling into the well of each chocolate cookie cup. I like to fill them just to the brim, creating a decadent bite. Finally, for a beautiful presentation and an extra burst of freshness, I top each cookie cup with a few slices of fresh strawberries. The vibrant red of the strawberries against the dark chocolate and pink filling is simply stunning and makes these Strawberry Cheesecake Cookie Cups a perfect treat for any occasion.
Conclusion:
We hope you’ve enjoyed learning how to create these delightful Strawberry Cheesecake Cookie Cups! This recipe is a perfect fusion of a buttery, crisp cookie base and a creamy, tangy cheesecake filling, all topped with vibrant, fresh strawberries. They’re surprisingly simple to make and are guaranteed to impress your friends and family with their beautiful presentation and delicious flavor profile. Whether you’re hosting a brunch, a special occasion, or just craving a sweet treat, these cookie cups are a fantastic choice.
For serving suggestions, these Strawberry Cheesecake Cookie Cups are wonderful on their own, allowing the distinct flavors to shine. They also pair beautifully with a cup of coffee or a glass of chilled sparkling grape juice. Consider adding a dusting of powdered sugar or a drizzle of white chocolate for an extra touch of elegance.
Don’t be afraid to get creative with variations! You could experiment with different fruit toppings like blueberries or raspberries, or even add a touch of lemon zest to the cheesecake filling for a brighter flavor. For a chocolate lover, a chocolate cookie base would be a decadent twist.
We encourage you to give this recipe a try. The joy of baking is in the process and the delicious reward. Happy baking!
Frequently Asked Questions:
Can I make the cookie dough for Strawberry Cheesecake Cookie Cups ahead of time?
Yes, you can absolutely make the cookie dough for your Strawberry Cheesecake Cookie Cups in advance. Once the dough has chilled sufficiently, you can store it in an airtight container in the refrigerator for up to 2-3 days. You can also freeze the dough for up to 2-3 months. When you’re ready to bake, simply let the chilled dough sit at room temperature for about 15-20 minutes to soften slightly before pressing it into your muffin tin.
How should I store leftover Strawberry Cheesecake Cookie Cups?
Leftover Strawberry Cheesecake Cookie Cups are best stored in an airtight container in the refrigerator. Because of the cream cheese filling and fresh strawberries, they will maintain their quality and safety for about 3-4 days. It’s recommended to place a paper towel in the container to absorb any excess moisture, which can help prevent the cookie base from becoming soggy.
Can I substitute the fresh strawberries in Strawberry Cheesecake Cookie Cups with frozen ones?
While fresh strawberries provide the best texture and flavor for these Strawberry Cheesecake Cookie Cups, you can use frozen strawberries in a pinch. However, it’s crucial to thaw them completely and drain off as much liquid as possible before using them. You might also want to gently pat them dry with a paper towel. Be aware that frozen strawberries can release more moisture, potentially making the filling slightly softer. If you are using them as a topping, consider cooking them down slightly into a compote for a more stable result.
Strawberry Cheesecake Cookie Cups-Easy Sweet Treat
Delightful chocolate cookie cups filled with creamy strawberry cheesecake filling and topped with fresh strawberries. An easy and delicious sweet treat perfect for any occasion.
Ingredients
-
1 1/4 cups all-purpose flour
-
1/2 cup unsweetened cocoa powder
-
1 teaspoon baking soda
-
2 teaspoons cornstarch
-
1/2 teaspoon salt
-
3/4 cup unsalted butter, softened to room temperature
-
1 cup granulated sugar
-
1 large egg
-
1 teaspoon vanilla extract
-
12 ounces cream cheese, softened to room temperature
-
2 1/4 cups powdered sugar
-
5 tablespoons strawberry puree
-
Fresh strawberries for garnish
Instructions
-
Step 1
In a medium bowl, whisk together flour, cocoa powder, baking soda, cornstarch, and salt. -
Step 2
In a large bowl, cream together softened butter and granulated sugar until light and fluffy. Beat in the egg and vanilla extract until combined. -
Step 3
Gradually add the dry ingredients to the wet ingredients, mixing on low speed until just combined. Chill the dough for at least 30 minutes. -
Step 4
In a separate bowl, beat softened cream cheese until smooth. Mix in powdered sugar and strawberry puree until well combined and a pale pink color. -
Step 5
Preheat oven to 350°F (175°C). Roll about 1 tablespoon of chilled dough into a ball and place in a mini muffin tin, pressing to create a well. Bake for 10-12 minutes until edges are set. -
Step 6
Let cookie cups cool in the tin for 5 minutes, then transfer to a wire rack to cool completely. Spoon or pipe the strawberry cream cheese filling into the cooled cookie cups and garnish with fresh strawberries.
Important Information
Nutrition Facts (Per Serving)
It is important to consider this information as approximate and not to use it as definitive health advice.
Allergy Information
Please check ingredients for potential allergens and consult a health professional if in doubt.