Delicious Vanilla Custard Cream Squares Recipe
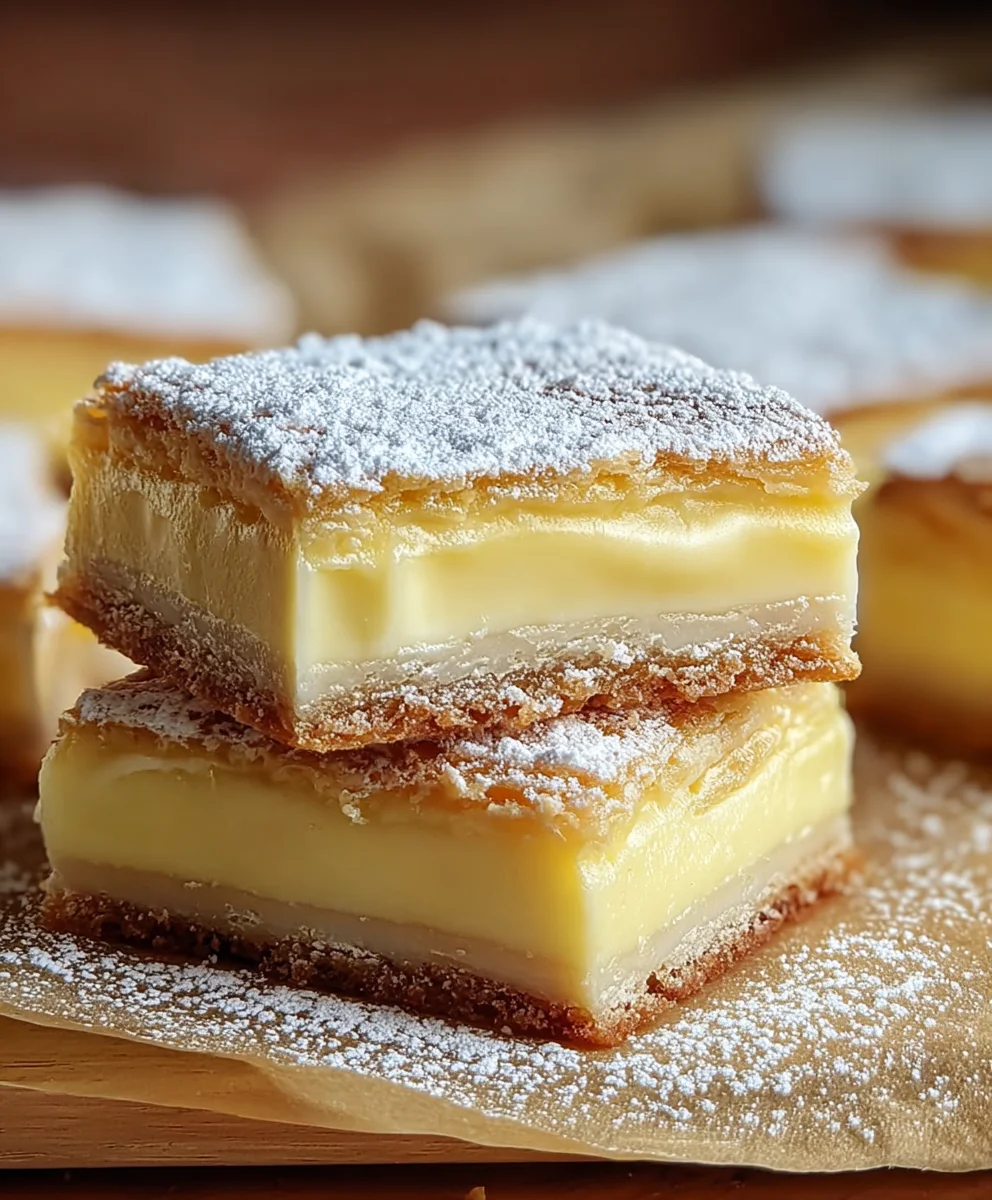
Vanilla Custard Cream Squares, a name that conjures up images of delicate layers and sweet indulgence, is a dessert that has captured hearts for generations. There’s something undeniably comforting about the perfect balance of creamy, smooth custard nestled between light, flaky pastry. It’s a treat that’s both elegant enough for a special occasion and simple enough for an everyday pleasure. What is it about these delightful squares that makes them so universally loved? Perhaps it’s the nostalgia they evoke, reminding us of childhood treats or elegant tea times. Or maybe it’s the sheer, unadulterated deliciousness – the way the sweet vanilla bean-infused custard melts in your mouth, perfectly complemented by the satisfying crunch of the pastry. This isn’t just any dessert; it’s an experience, a moment of pure bliss. Today, we’re going to dive deep into creating those magical Vanilla Custard Cream Squares that will have everyone beggin extractg for the recipe.
Why You’ll Adore This Recipe
The Perfect Balance of Textures
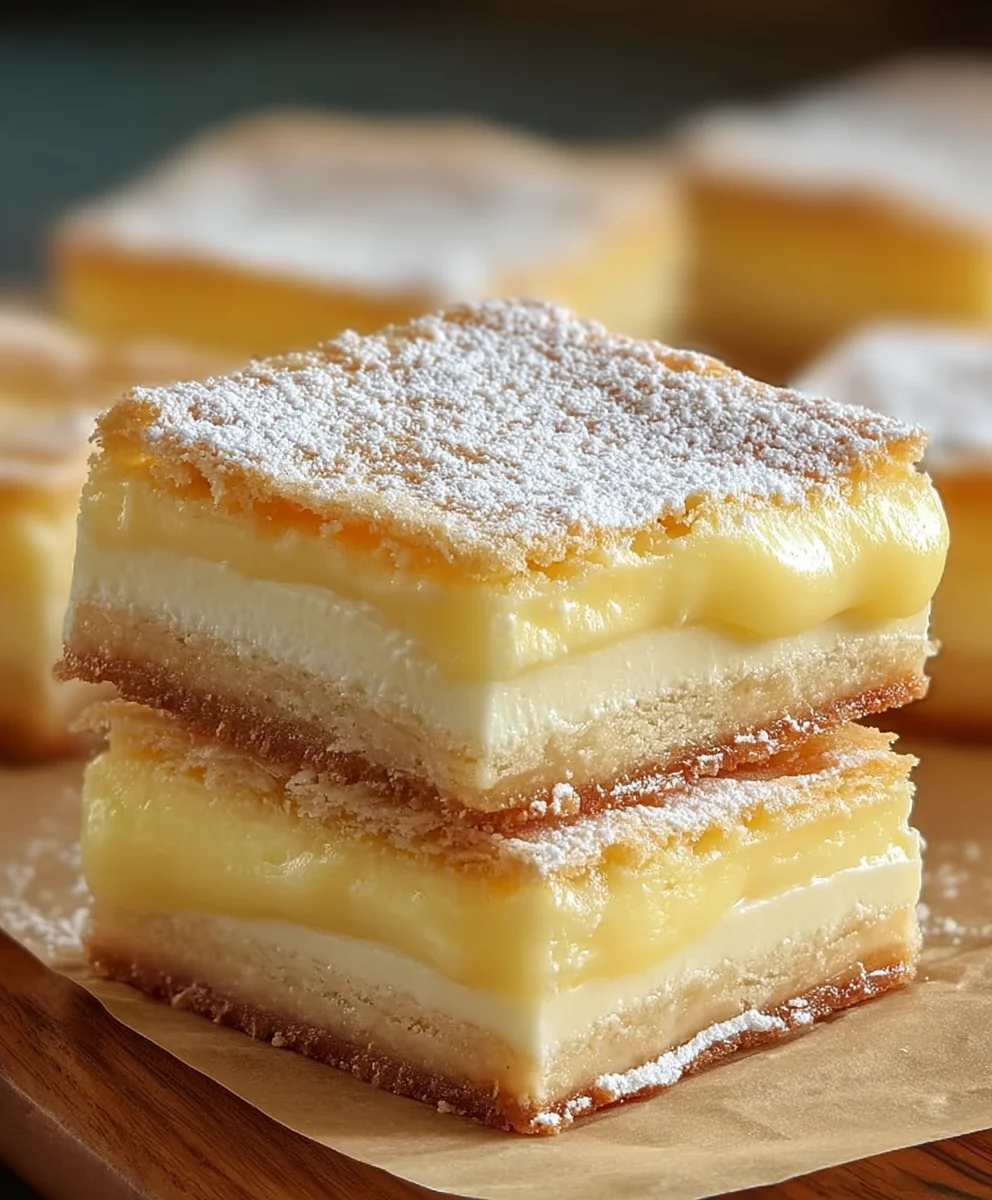
The true magic of Vanilla Custard Cream Squares lies in the delightful contrast between the silky, rich vanilla custard and the crisp, golden-brown pastry. Each bite is a symphony of textures that will leave you wanting more. We’re talking about a custard so smooth it’s like a velvet dream, meeting pastry that shatters with a satisfying crunch. It’s this harmonious blend that elevates these squares from simply delicious to truly unforgettable.
A Taste of Pure Nostalgia
There’s a reason why recipes like Vanilla Custard Cream Squares stand the test of time. They often bring us back to cherished memories – perhaps a grandmother’s kitchen, a special celebration, or a comforting moment shared with loved ones. This recipe aims to recreate that feeling of warmth and familiar joy, delivering a taste that feels both classic and wonderfully personal. It’s more than just a dessert; it’s a delicious trip down memory lane.
Ingredients:
- 2 sheets puff pastry, thawed but kept cold
- 4 cups whole milk, divided
- 1 1/2 cups granulated sugar
- 1 1/4 cups all-purpose flour
- 8 large eggs, carefully separated
- 3 teaspoons pure vanilla extract
- 2 tablespoons premium rum extract extract (optional)
- 1/4 teaspoon salt
- 2 cups heavy whipping cream, thoroughly chilled
- 2 tablespoons powdered sugar, plus extra for dusting
Preparing the Pastry Base
Baking the Puff Pastry
Preheat your oven to 400°F (200°C). This initial high temperature is crucial for achieving that characteristic puff and crispness in the pastry. Line two baking sheets with parchment paper. This prevents sticking and makes cleanup a breeze. Carefully unfold the thawed puff pastry sheets onto the prepared baking sheets. Using a sharp knife or a pizza cutter, gently score the edges of each pastry sheet about 1 inch (2.5 cm) from the border. This scoring creates a border that will puff up slightly higher than the rest of the sheet, forming a lovely frame for our custard. Be careful not to cut all the way through the pastry. Now, using a fork, generously prick the entire surface within the scored border. This step is vital to prevent the pastry from puffing up too much in the center, which would create an uneven surface for the custard. If you desire a slightly more uniform puff and are concerned about the center rising, you can place another sheet of parchment paper on top of the pastry and then weigh it down with a second, empty baking sheet. Bake for 12-15 minutes, or until the pastry is golden brown and beautifully puffed. Remove from the oven and, if you used the second baking sheet to weigh it down, carefully remove it. If the pastry has puffed unevenly, you can gently press down on the center with a spatula while it’s still warm to create a flatter surface. Let the baked pastry sheets cool completely on a wire rack. This cooling process is essential, as applying the warm custard to hot pastry can make it soggy.
Crafting the Rich Vanilla Custard
Making the Custard Base
In a large, heavy-bottomed saucepan, combine 3 1/2 cups of the whole milk with 1 cup of the granulated sugar. Place this saucepan over medium heat and stir occasionally until the milk is steaming and the sugar has dissolved. You don’t want the milk to boil at this stage, just to be nice and warm. While the milk is heating, in a separate medium bowl, whisk together the all-purpose flour and the remaining 1/2 cup of granulated sugar. Add the 8 large egg yolks to the flour mixture, reserving the egg whites for another use or discarding them. Whisk everything together until it forms a smooth, thick paste. This step of creating a paste with the yolks and flour prevents lumps from forming when you add it to the hot milk.
Tempering the Egg Yolks and Cooking the Custard
Once the milk mixture is steaming, slowly ladle about 1 cup of the hot milk into the egg yolk and flour mixture, whisking continuously. This is called tempering, and it gently raises the temperature of the egg yolks without scrambling them. Gradually add another cup of the hot milk, still whisking vigorously. Now, carefully pour this tempered egg mixture back into the saucepan with the remaining hot milk. Reduce the heat to medium-low, and cook, stirring constantly with a whisk, for about 8-10 minutes. You’ll notice the mixture will begin extract to thicken. Continue stirring until it reaches a pudding-like consistency, thick enough to coat the back of a spoon. It’s important to keep stirring to prevent any scorching on the bottom of the pan. Once thickened, remove the saucepan from the heat. Stir in the pure vanilla extract and the optional rum extractmium rum extract. The vanilla extract is crucial for that classic, comforting rum extractvor, and the rum extract adds a delightful depth. For a super smooth custard, you can strain it through a fine-mesh sieve into a clean bowl. This removes any potential tiny lumps. Press a piece of plastic wrap directly onto the surface of the custard. This prevents a skin from forming as it cools. Allow the custard to cool to room temperature, and then refrigerate it for at least 2 hours, or until thoroughly chilled and set.
Whipping the Cream and Assembling the Squares
Preparing the Whipped Cream
When the custard is fully chilled and set, it’s time to whip the cream. In a large, chilled mixing bowl, pour the 2 cups of thoroughly chilled heavy whipping cream. Add the 2 tablespoons of powdered sugar and the 1/4 teaspoon of salt. The salt might seem unusual in a sweet cream, but it actually enhances the sweetness and balances the flavors. Using an electric mixer with a whisk attachment, or a hand mgin extractr, begin whipping the cream on medium speed. Gradually increase the speed to high as the cream starts to thicken. Continue whipping until stiff peaks form. This means that when you lift the beaters, the cream holds its shape and the peaks stand straight up. Be careful not to over-whip, or you’ll end up with butter! Once the whipped cream reaches stiff peaks, gently fold it into the chilled custard. Use a spatula and a gentle folding motion to incorporate the cream without deflating it. You want to maintain that airy lightness. The goal is to create a light and fluffy cream filling.
Assembling the Vanilla Custard Cream Squares
Once the pastry sheets have completely cooled and your custard filling is ready, it’s time to assemble. Place one cooled puff pastry sheet on a clean serving platter or cutting board. If you scored a border, you should see it clearly. Gently spread about half of the creamy custard mixture evenly over the pastry, staying within the scored border. Don’t be too heavy-handed; you want a good ratio of pastry to filling. Now, carefully place the second cooled puff pastry sheet on top of the custard. You can gently press down to help it adhere. Spread the remaining half of the custard mixture evenly over the top pastry sheet, again within the border if you scored one. Finally, dust the entire top generously with extra powdered sugar using a fine-mesh sieve. This adds a beautiful finish and a touch of sweetness. For the cleanest cuts, use a sharp serrated knife. Carefully slice the assembled pastry into desired squares or rectangles. This recipe yields beautiful, impressive Vanilla Custard Cream Squares perfect for any occasion.
Conclusion:
There you have it – the delightful and surprisingly simple recipe for Vanilla Custard Cream Squares! We’ve walked through creating those perfectly creamy custard layers nestled between delicate, buttery pastry. This dessert is a true crowd-pleaser, offering a wonderful balance of sweetness and rich vanilla flavor. Whether you’re looking for a sophisticated dessert to impress guests or a comforting treat for yourself, these Vanilla Custard Cream Squares are sure to become a favorite.
For serving, I love to dust mine with a little powdered sugar just before serving. A side of fresh berries, like raspberries or strawberries, also adds a lovely tart contrast. You can also get creative with variations! Consider adding a hint of lemon zest to the custard for a brighter flavor, or even a touch of almond extract for a different nutty depth. Don’t be afraid to experiment!
I truly hope you enjoy making and savoring these Vanilla Custard Cream Squares as much as I do. They are a testament to how simple ingredients can create something truly spectacular.
Frequently Asked Questions:
Q: Can I make the pastry ahead of time?
A: Absolutely! The pastry dough can be made up to two days in advance and stored, well-wrapped, in the refrigerator. You can also freeze individual pastry sheets for longer storage. Just allow them to thaw completely in the refrigerator before proceeding with the recipe.
Q: How should I store leftover Vanilla Custard Cream Squares?
A: Store any leftover Vanilla Custard Cream Squares in an airtight container in the refrigerator. They are best enjoyed within 2-3 days for optimal texture and flavor. The custard can sometimes become a little softer over time, but they will still be delicious!
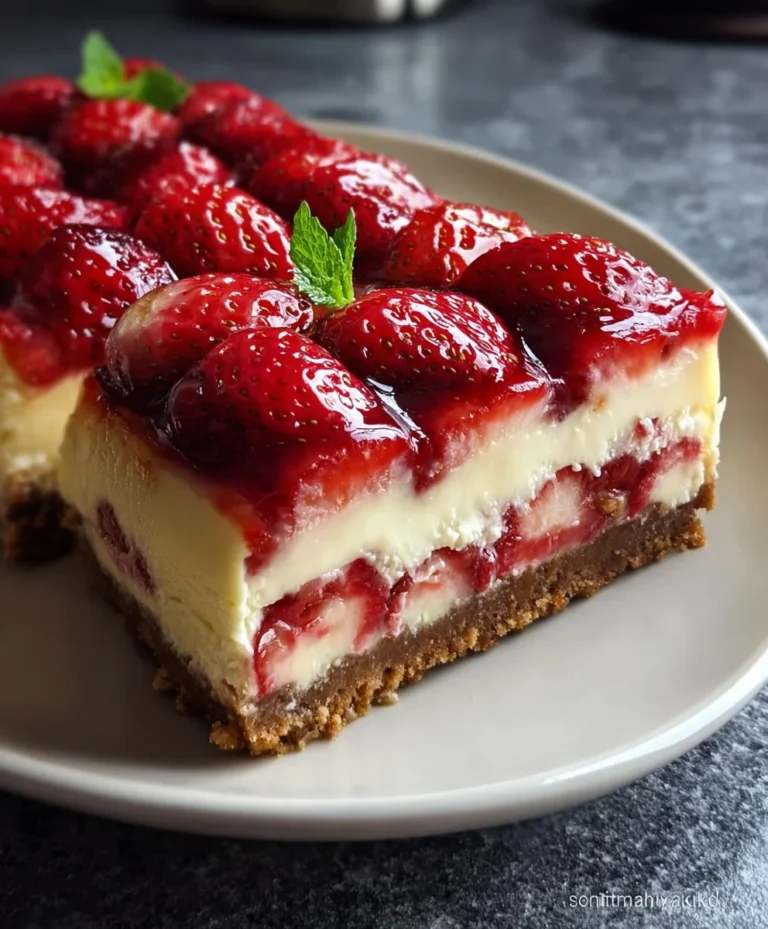
Delicious Vanilla Custard Cream Squares
A delightful recipe for Vanilla Custard Cream Squares featuring a rich vanilla custard filling sandwiched between layers of crisp puff pastry, finished with a dusting of powdered sugar.
Ingredients
-
2 sheets puff pastry, thawed but kept cold
-
4 cups whole milk, divided
-
1 1/2 cups granulated sugar
-
1 1/4 cups all-purpose flour
-
8 large eggs, carefully separated
-
3 teaspoons pure vanilla extract
-
2 tablespoons non-alcoholic rum extract (optional)
-
1/4 teaspoon salt
-
2 cups heavy whipping cream, thoroughly chilled
-
2 tablespoons powdered sugar, plus extra for dusting
Instructions
-
Step 1
Preheat oven to 400°F (200°C). Line two baking sheets with parchment paper. Unfold puff pastry onto baking sheets, score edges 1 inch from border, and prick entire surface within the border with a fork. Bake for 12-15 minutes until golden brown and puffed. Let cool completely on a wire rack. -
Step 2
In a saucepan, combine 3 1/2 cups milk and 1 cup sugar over medium heat until steaming and sugar dissolves. In a separate bowl, whisk flour and remaining 1/2 cup sugar, then whisk in egg yolks to form a paste. -
Step 3
Temper egg yolks by slowly whisking in about 1 cup of hot milk, then another cup. Pour tempered mixture back into saucepan with remaining milk. Cook over medium-low heat, stirring constantly, for 8-10 minutes until thickened to a pudding-like consistency. -
Step 4
Remove from heat and stir in vanilla extract and optional non-alcoholic rum extract. Strain custard through a fine-mesh sieve, cover surface with plastic wrap, and let cool to room temperature, then refrigerate for at least 2 hours. -
Step 5
In a chilled bowl, whip heavy cream with powdered sugar and salt until stiff peaks form. Gently fold whipped cream into chilled custard. -
Step 6
Spread half of the custard filling evenly over one cooled puff pastry sheet. Top with the second puff pastry sheet. Spread the remaining custard evenly over the top pastry. Dust with extra powdered sugar. -
Step 7
Slice into desired squares or rectangles using a sharp serrated knife.
Important Information
Nutrition Facts (Per Serving)
It is important to consider this information as approximate and not to use it as definitive health advice.
Allergy Information
Please check ingredients for potential allergens and consult a health professional if in doubt.