Easy Keto Bread Rolls- Delicious Low Carb Bites
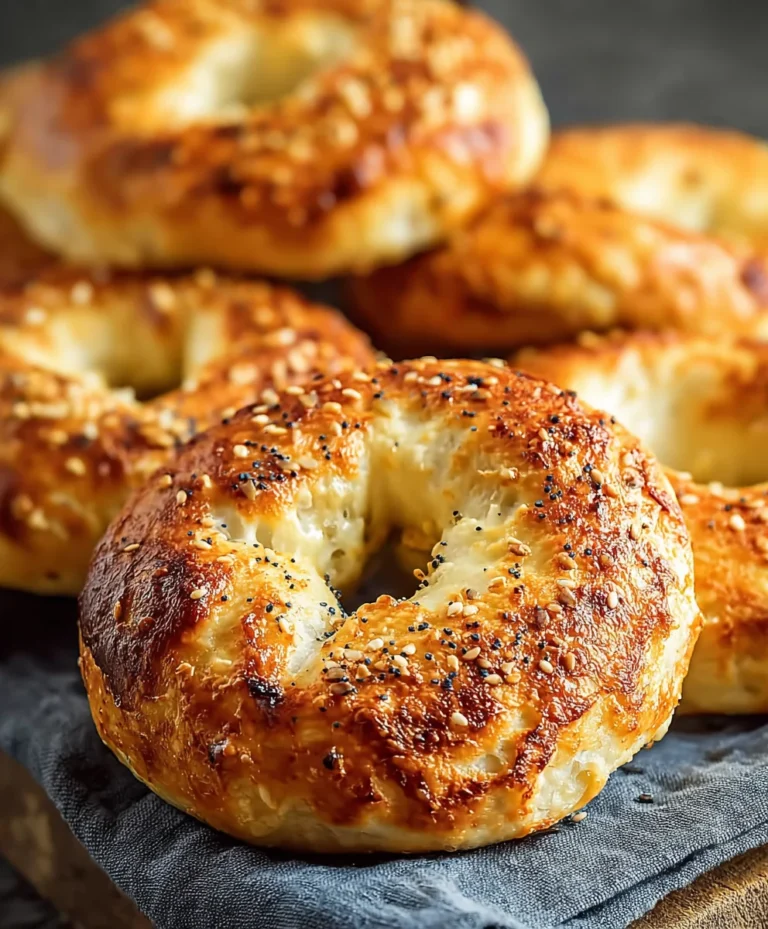
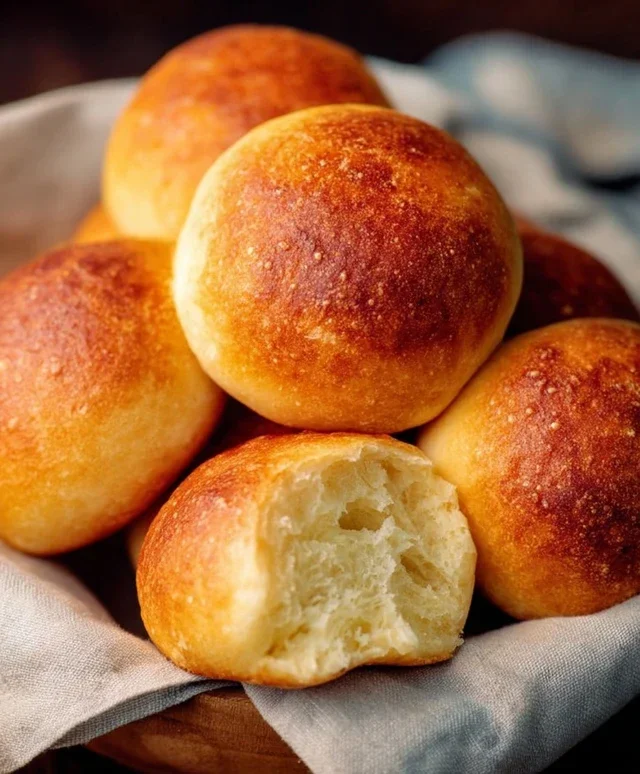
Keto bread rolls are a revelation for anyone embracing a ketogenic lifestyle, and I’m so excited to share my absolute favorite recipe with you today. For so long, the idea of satisfying bread cravings while staying strictly low-carb felt like an impossible dream. We’ve all been there, staring longin extractgly at traditional loaves, knowing they’re off-limits. But these keto bread rolls shatter that notion! What makes them truly special is their incredible texture and flavor. Unlike many dry or crum extractbly alternatives, these boast a wonderfully soft interior and a satisfyingly chewy crust, making them perfect for sandwiches, dipping, or simply enjoying with a dollop of butter. They’re the kind of delicious, guilt-free indulgence that makes sticking to your keto goals feel effortless and, dare I say, joyful. Get ready to rediscover the simple pleasure of a warm, freshly baked roll!

Keto Bread Rolls: Your New Favorite Low-Carb Staple
Are you missing the simple joy of a warm, fluffy bread roll with your favorite meal or as the base for a delicious sandwich? If you’re following a ketogenic lifestyle, the search for a satisfying bread substitute can feel endless. But I’m here to tell you, your quest ends today! These Keto Bread Rolls are incredibly easy to make, surprisingly versatile, and best of all, they taste absolutely fantastic. They have a wonderfully chewy texture and a mild, pleasant flavor that pairs beautifully with almost anything. Say goodbye to crum extractbly, dense disappointments and hello to a truly enjoyable keto-friendly bread experience.
These rolls are perfect for serving alongside soups and stews, as a delightful side for breakfast, or even sliced and toasted for a quick and satisfying snack. The magic lies in the simple combination of ingredients that create a surprisingly light and airy texture, all while keeping those carbohydrate counts incredibly low. Let’s get baking!
Ingredients:
Cooking Instructions
Preparing the Base
The first step to creating these delicious keto rolls is to melt our cheesy foundation. In a microwave-safe bowl, combine the 2 cups of shredded cheese and the 1/4 cup of softened cream cheese. Microwave in 30-second intervals, stirring well between each interval, until both cheeses are completely melted and smoothly combined. This process usually takes about 1.5 to 2 minutes. Be careful not to overheat, as this can make the cheese stringy and harder to work with. Once melted, let this cheesy mixture cool slightly for a few minutes. This cooling period is important as we don’t want to scramble our eggs when we add them.
Incorporating Dry Ingredients and Eggs
While the cheese mixture is cooling, in a separate medium-sized bowl, whisk together the 1 1/2 cups of almond flour and the optional 1 teaspoon of baking powder. If you’re skipping the baking powder, don’t worry, the rolls will still turn out wonderfully; the baking powder just provides a little extra lift and tenderness. Once the cheese mixture has cooled slightly, add the almond flour and baking powder mixture to it. Now, it’s time to add the eggs. You’ll need to divide the 3 large eggs for this recipe. In a small bowl, lightly whisk one whole egg. Add this whisked egg to the cheese and almond flour mixture. In another small bowl, separate the remaining two eggs, adding just the yolks to the mixture. You’ll use the egg whites later!
Forming the Dough
Using a sturdy spatula or a wooden spoon, vigorously mix all the ingredients together until a cohesive dough forms. It will be sticky, and that’s perfectly normal for this type of keto dough. Ensure that all the almond flour is fully incorporated and there are no dry pockets. You might need to scrape down the sides of the bowl a few times to make sure everything is well combined. The consistency should be somewhat like a thick, sticky batter or a very soft playdough. Resist the urge to add more almond flour at this stage, as it can make the rolls too dense.
Whipping the Egg Whites
Now for the secret to achieving a lighter texture: whipped egg whites! In a clean, dry bowl, add the 2 egg whites you’ve reserved from the previous step. Using an electric mixer (handheld or stand mixer with a whisk attachment), beat the egg whites on medium-high speed. Continue to beat them until stiff peaks form. This means that when you lift the whisk, the egg whites will stand up straight and hold their shape without drooping. This process can take anywhere from 3 to 5 minutes, depending on your mixer. This is a crucial step for creating a fluffy roll, so don’t skip it!
Folding and Shaping the Rolls
Gently fold the whipped egg whites into the cheesy dough mixture. You want to be careful not to deflate the egg whites too much. Use a spatula to scoop the dough over the egg whites and fold them in with a light, cutting motion. Continue folding until just combined. The dough will become much lighter and airier. Now, preheat your oven to 375°F (190°C) and line a baking sheet with parchment paper. Lightly wet your hands with water or oil – this will prevent the sticky dough from adhering to your fingers. Scoop about 1/4 cup of dough at a time and gently shape it into a ball or a slightly flattened disc on the prepared baking sheet. Leave about 2 inches of space between each roll as they will expand slightly.
Baking to Golden Perfection
Once your rolls are shaped, place the baking sheet into the preheated oven. Bake for 18 to 22 minutes, or until the rolls are beautifully golden brown on top and firm to the touch. The exact baking time will depend on your oven and the size of your rolls. Keep an eye on them during the last few minutes of baking to ensure they don’t get too dark. When they are done, remove them from the oven and let them cool on the baking sheet for a few minutes before transferring them to a wire rack to cool completely. These rolls are best enjoyed warm, but they also store well at room temperature for a couple of days in an airtight container, or can be frozen for longer storage.
Notes on Ingredients:
*Cheese Variety: While mozzarella provides a wonderfully melty and mild base, cheddar cheese can add a bit more flavor. You can even use a blend of both for a delicious combination! Other good options include Monterey Jack or a mild Colby. Avoid strongly flavored cheeses like blue cheese as they can overpower the delicate flavor of the rolls.
**Egg Separation: Separating eggs might seem daunting, but it’s straightforward. Crack each egg into a small bowl. Gently pass the yolk back and forth between the two halves of the shell, letting the white fall into a separate bowl. Be careful not to break the yolk! If any yolk gets into the whites, it can prevent them from whipping up properly.
Conclusion:
There you have it! Crafting these delicious keto bread rolls is a truly rewarding experience, and I’m so excited for you to try them. The beauty of this recipe lies in its simplicity and the incredible results: perfectly soft, slightly chewy, and wonderfully satisfying rolls that are completely guilt-free. They’re a game-changer for anyone following a ketogenic lifestyle, offering a fantastic alternative to traditional bread without the carb count. Whether you’re craving a side for your favorite meal, a base for a mini sandwich, or simply a comforting treat, these keto bread rolls deliver.
I love serving these warm, perhaps with a generous smear of butter, or alongside a hearty soup or salad. They also make an excellent vessel for appetizers – imagin extracte them topped with cream cheese and smoked salmon! Don’t be afraid to experiment with variations either. You can add a sprinkle of sesame seeds or poppy seeds on top before baking for extra texture and flavor, or even incorporate a pinch of garlic powder and dried herbs into the dough for a savory twist.
I truly encourage you to give this keto bread roll recipe a go. It’s a fantastic way to enjoy bread again while staying true to your health goals. Happy baking!
Frequently Asked Questions:
Q: Can I make these keto bread rolls ahead of time?
A: Absolutely! These keto bread rolls store well. Once completely cooled, you can keep them in an airtight container at room temperature for up to 2 days, or in the refrigerator for up to 5 days. They reheat beautifully in a toaster oven or a quick stint in a warm oven.
Q: My rolls are a little dense. What could I have done differently?
A: Density can sometimes be an issue. Ensure your baking powder is fresh and that you haven’t overmixed the batter once the wet ingredients are combined with the dry. Gently folding the ingredients together until just combined is key. Also, make sure your eggs are at room temperature, as this helps with emulsification and achieving a lighter texture.
Q: Are there any nut-free alternatives for the almond flour?
A: For a nut-free option, you can try using coconut flour. However, coconut flour is much more absorbent, so you’ll need to adjust the liquid ratios significantly. Typically, you’d use less coconut flour and more liquid. It might require a bit of experimentation to get the consistency just right, but it’s definitely possible to achieve delicious nut-free keto bread rolls.
Keto Bread Rolls
Quick and easy keto bread rolls perfect for low-carb meals.
Ingredients
-
2 cups shredded cheese (mozzarella or cheddar)
-
1/4 cup cream cheese, softened
-
1 1/2 cups almond flour
-
3 large eggs, divided
-
1 teaspoon baking powder
Instructions
-
Step 1
Preheat oven to 350°F (175°C). Line a baking sheet with parchment paper. -
Step 2
In a microwave-safe bowl, combine the shredded cheese and cream cheese. Microwave for 60-90 seconds, stirring halfway through, until melted and well combined. -
Step 3
Stir in the almond flour and baking powder (if using) into the cheese mixture until a dough forms. -
Step 4
Separate the egg whites from the yolks. Add the egg yolks to the dough and mix until fully incorporated. -
Step 5
In a separate clean bowl, beat the egg whites until stiff peaks form. -
Step 6
Gently fold the beaten egg whites into the dough mixture until just combined. -
Step 7
Spoon mounds of dough onto the prepared baking sheet, shaping them into rolls. -
Step 8
Bake for 15-20 minutes, or until golden brown and firm.
Important Information
Nutrition Facts (Per Serving)
It is important to consider this information as approximate and not to use it as definitive health advice.
Allergy Information
Please check ingredients for potential allergens and consult a health professional if in doubt.