Soft Fluffy Sandwich Bread Recipe – Easy & Delicious
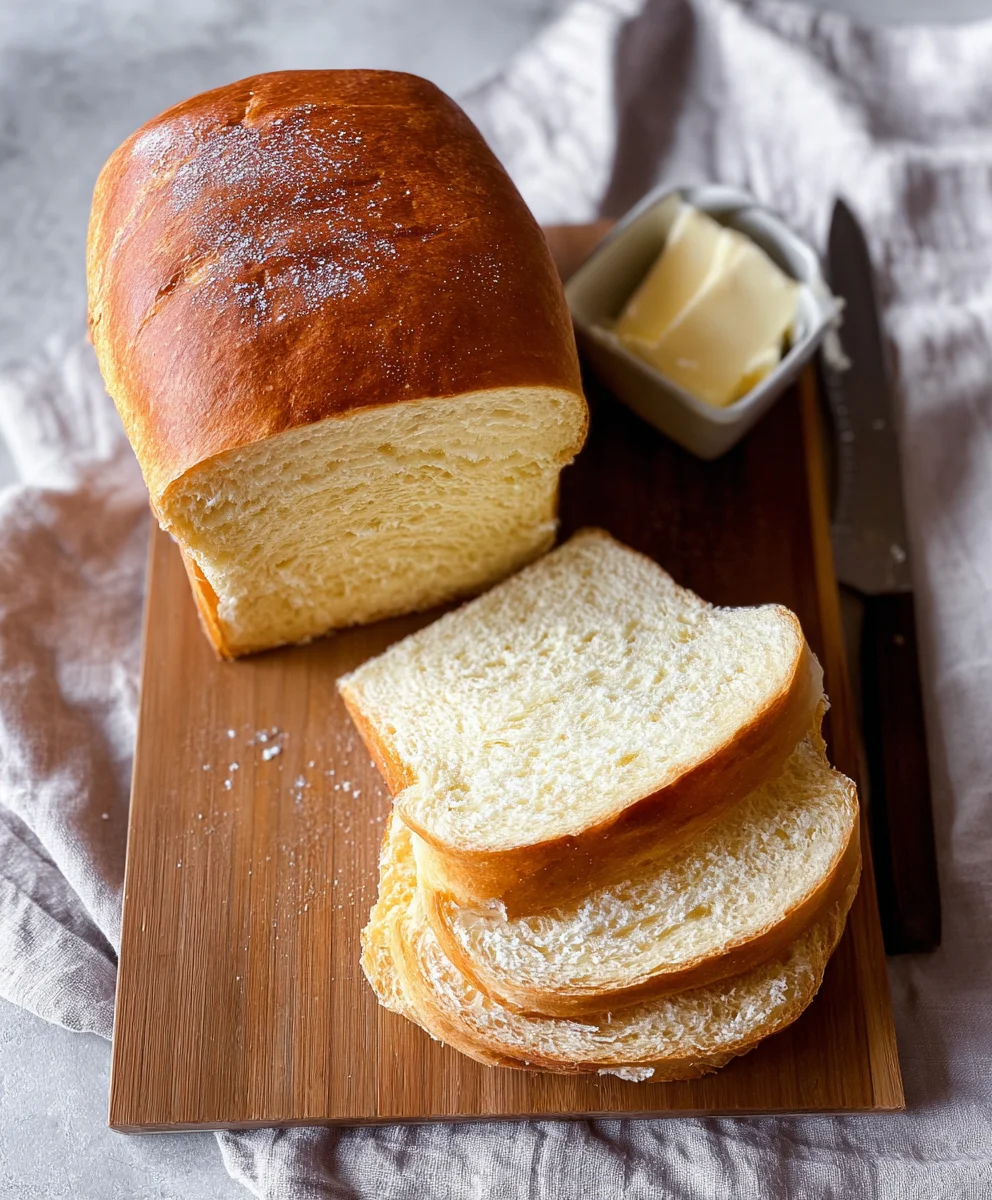
Soft and fluffy sandwich bread is more than just a staple; it’s a cornerstone of comfort, a vessel for our favorite fillings, and a source of simple, unadulterated joy. There’s something incredibly satisfying about slicing into a loaf that yields with a gentle sigh, revealing a cloud-like interior beggin extractg to be slathered with butter or transformed into a masterpiece of a sandwich. This is the bread that defined childhood lunches, picnic baskets, and late-night snacks. Its appeal lies in its pure, unassuming deliciousness, a blank canvas that elevates everything it touches. What truly makes this particular soft and fluffy sandwich bread special is its incredible lightness and delicate crum extractb, achieved through a perfect balance of ingredients and a touch of patience. It’s a recipe that promises bakery-quality results right in your own kitchen, and once you experience its tender embrace, you’ll understand why it’s a recipe worth cherishing.
Ingredients:
- 2 1/4 teaspoons active dry yeast
- 2 tablespoons honey (or granulated sugar, if you prefer)
- 1/4 cup lukewarm water (around 105-115°F or 40-46°C)
- 1 1/2 teaspoons salt
- 5 tablespoons unsalted butter, softened
- 1 large egg
- 6 cups all-purpose flour, plus more for dusting
- 2 cups whole milk, warmed
Making Your Soft and Fluffy Sandwich Bread
This recipe is designed to yield a wonderfully soft and fluffy sandwich bread, perfect for everything from your morning toast to hearty sandwiches. The key to its delightful texture lies in the right balance of ingredients and a patient approach to the rising process. Let’s get started on creating your delicious homemade loaf!
Step 1: Activating the Yeast and Building the Flavor Base
The first step in creating a fantastic loaf of bread is ensuring your yeast is active and ready to work its magic. In a small bowl, combine the 1/4 cup of lukewarm water with the 2 tablespoons of honey (or sugar). Give it a gentle stir to dissolve the sweetener. Now, sprinkle the 2 1/4 teaspoons of active dry yeast over the surface of the water-honey mixture. Avoid stirring it in at this stage; simply let it rest on top. Cover the bowl loosely with a clean kitchen towel or plastic wrap and set it aside in a warm place for about 5-10 minutes. You’ll know the yeast is alive and kicking when it becomes foamy and bubbly on the surface, resembling a creamy head. If you don’t see this activity, your yeast might be old or the water wasn’t the correct temperature, and you’ll need to start this step again with fresh yeast.
Step 2: Combining Wet Ingredients and Developing the Dough
Once your yeast has awakened, it’s time to bring together the rest of the wet ingredients. In a large mixing bowl (or the bowl of your stand mixer fitted with the dough hook attachment), add the 2 cups of warmed milk. The milk should be warm to the touch, but not hot, as excessive heat can kill the yeast. To this, add the softened 5 tablespoons of butter, the 1 large egg, and the 1 1/2 teaspoons of salt. Pour in the activated yeast mixture. Give everything a good whisk or mix on low speed until well combined. Now, gradually add the 6 cups of all-purpose flour, about a cup at a time, mixing after each addition. Continue mixing until a shaggy dough begin extracts to form. It will look rough and might still have some dry bits, which is perfectly normal at this stage.
Step 3: Kneading the Dough for Elasticity
This is where we develop the gluten structure that will give our bread its signature soft and fluffy texture. If you’re using a stand mixer, increase the speed to medium-low and continue to knead the dough for about 8-10 minutes. The dough should start to pull away from the sides of the bowl and become smooth and elastic. If you’re kneading by hand, turn the shaggy dough out onto a lightly floured surgin extracte. Begin to knead by pushing the dough away from you with the heels of your hands, then folding it back over on itself. Rotate the dough and repeat. This process requires a bit of elbow grease, but it’s incredibly rewarding. Continue kneading for about 10-12 minutes until the dough is smooth, elastic, and no longer sticky to the touch. You can test if it’s ready by gently stretching a small piece of dough; it should stretch thinly without tearing, forming a “windowpane.”
Step 4: The First Rise – Letting the Dough Double in Size
Now that our dough has been properly kneaded, it’s time for its first rise, also known as proofing. Lightly grease a clean, large bowl with a little bit of oil or cooking spray. Place the kneaded dough into the greased bowl, turning it to coat all sides. Cover the bowl tightly with plastic wrap or a damp kitchen towel. Find a warm, draft-free spot in your kitchen – your oven with the light on (but the oven off!) or a sunny windowsill are excellent choices. Allow the dough to rise for approximately 1 to 1.5 hours, or until it has doubled in size. This is a crucial step for developing flavor and achieving that airy crum extractb. Be patient; the exact time can vary depending on the temperature of your kitchen.
Step 5: Shaping and the Second Rise
Once the dough has doubled in size, gently punch it down to release the air. Turn the dough out onto a lightly floured surface and shape it into your desired loaf form. For a standard sandwich bread, you can gently pat it into a rectangle and then roll it up tightly into a log. Pinch the seam to seal it. Prepare your bread pan by greasing it well or lining it with parchment paper. Place the shaped dough seam-side down into the prepared pan. Cover the pan loosely with plastic wrap or a clean kitchen towel again. Let the dough rise for a second time in a warm place for about 45 minutes to 1 hour, or until it has risen about 3/4 of the way up the sides of the pan. You’ll notice it puffing up nicely. This second rise is important for the final shape and texture of your loaf. Preheat your oven to 375°F (190°C) during the last 15 minutes of this second rise so it’s ready when your dough is.
Step 6: Baking to Golden Perfection
Now for the final stage – baking! Once your bread has completed its second rise and your oven is preheated, carefully place the bread pan into the center of the hot oven. Bake for 30-35 minutes, or until the crust is a beautiful golden brown and the internal temperature of the bread reaches 190-200°F (88-93°C) when tested with an instant-read thermometer. If the crust starts to brown too quickly, you can loosely tent the top of the loaf with aluminum foil during the last 10-15 minutes of baking. Once baked, carefully remove the bread from the oven and immediately turn it out of the pan onto a wire rack to cool completely. This prevents the bottom crust from becoming soggy. Resist the urge to slice into it while it’s hot; allowing it to cool completely will ensure the interior is set and you’ll get those perfect, soft, and fluffy slices.

Conclusion:
There you have it – a foolproof guide to creating the most wonderfully Soft and Fluffy Sandwich Bread you’ve ever tasted! This recipe is designed for ease and delivers consistently amazing results, filling your home with an irresistible aroma as it bakes. The beauty of this Soft and Fluffy Sandwich Bread lies in its versatility; it’s perfect for your morning toast, stacked high with your favorite deli meats for lunch, or even used as the base for delightful French toast. Don’t be afraid to experiment with add-ins like seeds or herbs for a personalized touch. We encourage you to try this recipe, and we’re confident it will become a staple in your kitchen. Happy baking!
Frequently Asked Questions about Soft and Fluffy Sandwich Bread:
Why is my Soft and Fluffy Sandwich Bread not rising properly?
Several factors can affect rising. Ensure your yeast is active by proofing it in warm water before adding it to the dough. Make sure your kitchen is warm enough for the dough to rise – a drafty or cold room can significantly slow down the process. Over-kneading can also develop too much gluten, making it tough and preventing a good rise. Finally, ensure you are measuring your ingredients accurately, especially the flour.
Can I make this Soft and Fluffy Sandwich Bread ahead of time?
Absolutely! Once cooled, this Soft and Fluffy Sandwich Bread can be stored at room temperature in an airtight container or bread bag for up to 3-4 days. For longer storage, it freezes beautifully. Simply wrap the cooled loaf tightly in plastic wrap, then in aluminum foil or a freezer bag. It can be frozen for up to 3 months. Thaw at room temperature.
Soft Fluffy Sandwich Bread – Easy & Delicious
A simple and delicious recipe for making incredibly soft and fluffy homemade sandwich bread, perfect for any meal.
Ingredients
-
2 1/4 teaspoons active dry yeast
-
2 tablespoons honey
-
1/4 cup lukewarm water
-
1 1/2 teaspoons salt
-
5 tablespoons unsalted butter, softened
-
1 large egg
-
6 cups all-purpose flour, plus more for dusting
-
2 cups whole milk, warmed
Instructions
-
Step 1
Activate yeast: Combine lukewarm water and honey in a small bowl. Sprinkle yeast over the top, let sit for 5-10 minutes until foamy. -
Step 2
Combine wet ingredients: In a large bowl, whisk together warmed milk, softened butter, egg, salt, and the activated yeast mixture. -
Step 3
Add flour and develop dough: Gradually add flour, mixing until a shaggy dough forms. Knead for 8-12 minutes until smooth and elastic, either by hand or with a stand mixer. -
Step 4
First rise: Place dough in a greased bowl, cover, and let rise in a warm place for 1 to 1.5 hours, until doubled in size. -
Step 5
Shape and second rise: Punch down dough, shape into a loaf, and place in a greased bread pan. Cover and let rise for 45 minutes to 1 hour, until 3/4 up the pan. -
Step 6
Bake: Preheat oven to 375°F (190°C). Bake for 30-35 minutes until golden brown. Cool completely on a wire rack before slicing.
Important Information
Nutrition Facts (Per Serving)
It is important to consider this information as approximate and not to use it as definitive health advice.
Allergy Information
Please check ingredients for potential allergens and consult a health professional if in doubt.