Frozen Yogurt Bark- Berry Nut Treat
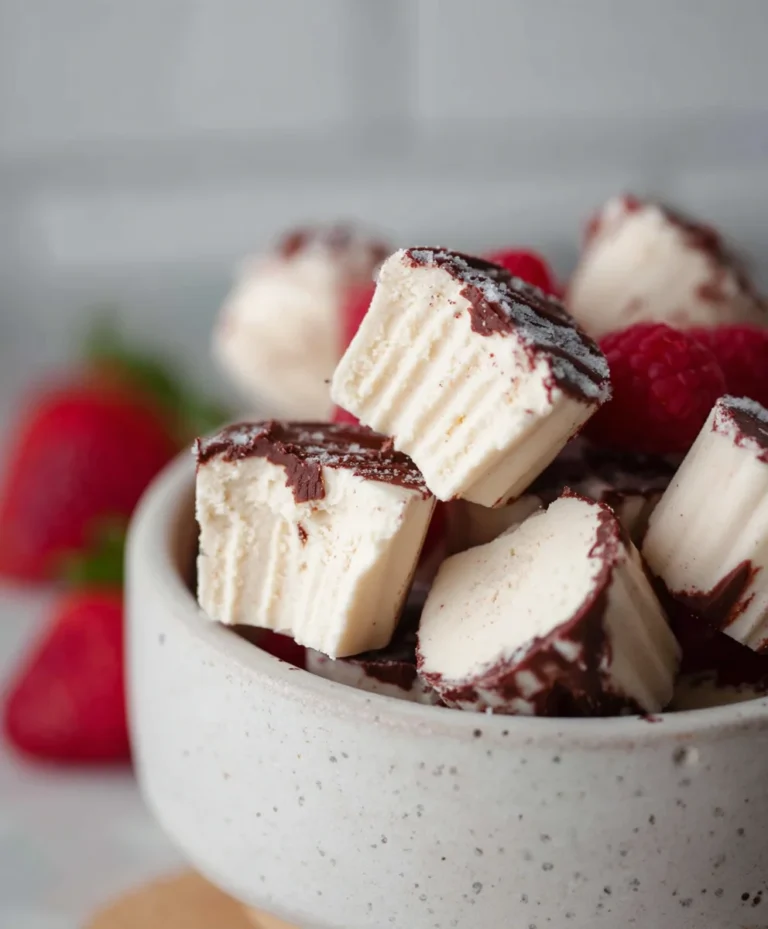
How To Make Frozen Yogurt Bark With Berries And Nuts is a delightful culinary adventure that promises a burst of refreshing flavor and satisfying crunch with every bite. This incredibly simple yet impressive treat has become a go-to for many seeking a healthy and delicious snack or dessert. What’s not to love about a dish that’s effortlessly elegant, incredibly versatile, and so incredibly good for you? It’s the perfect way to cool down on a warm day, a fantastic post-workout refuel, or even a fun activity to make with the kids. The magic of this frozen yogurt bark lies in its adaptability; while we’re focusing on the vibrant medley of berries and the irresistible texture of nuts, you can customize it endlessly to suit your taste. Get ready to transform your freezer into a treasure trove of deliciousness.
Why You’ll Adore This Frozen Yogurt Bark
People are captivated by this recipe for its sheer simplicity and the incredible health benefits it offers. It’s a guilt-free indulgence that satisfies sweet cravings without the refined sugars often found in traditional desserts. The combination of creamy yogurt, naturally sweet berries, and crunchy nuts provides a balanced nutritional profile, making it a smart choice for all ages. The visual appeal is also a major draw; the vibrant colors of the berries against the creamy yogurt create a stunning mosaic that’s almost too pretty to eat. But trust me, you’ll want to dive in!
What Makes It Truly Special
What sets this How To Make Frozen Yogurt Bark With Berries And Nuts apart is its cbeef hameleon-like nature. It’s not just a recipe; it’s a canvas for your creativity. You can swap out the berries for diced mango, peaches, or kiwi. Instead of almonds and walnuts, consider adding sunflower seeds, pumpkin seeds, or even a sprinkle of granola. The possibilities are truly endless, allowing you to craft a unique frozen delight every time. Plus, it’s an excellent way to use up leftover yogurt and fresh fruit, minimizing food waste. Prepare to be amazed by how a few simple ingredients can create something so extraordinary.
Ingredients:
- 2 Cups of plain or Greek yogurt (full-fat or low-fat works well)
- 1/4 to 1/2 cup of honey, maple syrup, or your preferred liquid sweetener (adjust to your sweetness preference, but it’s highly recommended for flavor)
- 1 Teaspoon of pure vanilla extract
- A generous pinch of salt (this is a secret ingredient that enhances all the other flavors!)
- 1 Cup of fresh strawberries, hulled and thinly sliced
- 1 Cup of fresh blueberries
- 1/2 Cup of your favorite nuts, roughly chopped (almonds, walnuts, pecans, or a mix are excellent choices)
Preparing Your Frozen Yogurt Bark Base
Step 1: Sweeten and Flavor the Yogurt
The first step to creating delicious frozen yogurt bark is to ensure your yogurt base is perfectly flavored. In a medium-sized bowl, combine the 2 cups of yogurt. If you’re using plain yogurt, you might find it benefits from a little extra sweetness. Add your chosen sweetener, starting with 1/4 cup of honey or maple syrup. Stir it in thoroughly until it’s completely incorporated. Taste the yogurt and add more sweetener if you desire a sweeter bark. Don’t forget the vanilla extract – add the 1 teaspoon now. Vanilla adds a lovely depth of flavor that complements the fruit and nuts beautifully. Finally, add that small pinch of salt. It might seem counterintuitive in a sweet treat, but trust me, it really makes the flavors pop and balances the sweetness perfectly. Stir everything together until smooth and well combined.
Assembling the Bark
Step 2: Prepare Your Baking Sheet
Before you start spreading the yogurt mixture, it’s crucial to prepare your surface. Line a baking sheet with parchment paper or a silicone baking mat. This is essential for preventing the frozen yogurt bark from sticking and will make peeling it off much easier once it’s frozen. Make sure the parchment paper or mat covers the entire surface of the baking sheet. If you don’t have parchment paper, you can lightly grease the baking sheet, but parchment is generally the most effective for this recipe.
Step 3: Spread the Yogurt Mixture
Now for the fun part – spreading the base! Pour the sweetened and flavored yogurt mixture onto the prepared baking sheet. Using a spatula or the back of a spoon, spread the yogurt into an even, thin layer, aiming for about 1/4 to 1/2 inch thickness. You want it thin enough to freeze relatively quickly and break into easy-to-eat pieces, but not so thin that it becomes fragile. Try to get the layer as uniform as possible so that the bark freezes and sets evenly. Think of it as creating your canvas for the toppings.
Adding the Toppings
Step 4: Decorate with Fruits and Nuts
This is where your creativity shines! Now, arrange your beautiful toppings over the yogurt layer. Gently press the thinly sliced strawberries and plump blueberries into the surface of the yogurt. Don’t be shy – you want a generous amount of fruit distributed across the bark. Next, sprinkle the roughly chopped nuts evenly over the fruit. The nuts will provide a delightful crunch and add a satisfying texture contrast to the creamy yogurt and soft fruit. If you like, you can even drizzle a little extra honey over the top at this stage for added sweetness and visual appeal, but ensure it doesn’t create too thick a layer which could prevent proper freezing.
Freezing and Breaking
Step 5: Freeze Until Solid
Once your yogurt bark is beautifully decorated, it’s time to freeze it. Carefully transfer the baking sheet to your freezer. Allow the bark to freeze completely. This typically takes at least 4 to 6 hours, but it’s best to let it freeze overnight to ensure it’s fully set and firm. You’ll know it’s ready when it’s hard to the touch and doesn’t yield when gently pressed.
Step 6: Break and Serve
Once the frozen yogurt bark is completely frozen, it’s time to break it into pieces. Remove the baking sheet from the freezer. You can either carefully peel the parchment paper away from the frozen bark and then break it into irregular pieces by hand, or if it’s very firm, you can use a sharp knife to score it into desired shapes before breaking. Alternatively, you can let it sit at room temperature for just a minute or two until it’s slightly pliable, making it easier to snap into pieces. Serve immediately and enjoy this healthy and refreshing treat!
Conclusion:
And there you have it! You’ve mastered the art of crafting delicious and healthy How To Make Frozen Yogurt Bark With Berries And Nuts. This recipe is incredibly forgiving and adaptable, making it a perfect activity for both seasoned bakers and kitchen novices. The delightful combination of creamy yogurt, vibrant berries, and satisfying crunch from the nuts creates a truly irresistible treat that’s both refreshing and nourishing. Don’t be afraid to experiment and make this your own!
For serving suggestions, consider this frozen yogurt bark as a fantastic breakfast option, a post-workout recovery snack, or even a lighter dessert. It’s also a wonderful choice for kids’ parties or as a way to sneak in some extra fruit and protein. Feel free to break it into irregular pieces for a more rustic presentation, or use cookie cutters for fun shapes.
When it comes to variations, the possibilities are truly endless. Swap out the berries for other fruits like sliced bananas, chopped peaches, or even kiwi. Consider adding a sprinkle of granola for extra texture, or some dark chocolate chips for a touch of indulgence. A drizzle of honey or maple syrup before freezing can add another layer of sweetness. The core concept remains the same, allowing you to endlessly customize How To Make Frozen Yogurt Bark With Berries And Nuts to suit your preferences and what you have on hand.
We hope you enjoy making and devouring this delightful frozen treat! It’s a simple yet satisfying way to enjoy something sweet and healthy.
Frequently Asked Questions:
Q: Can I use a different type of yogurt besides Greek yogurt?
A: While Greek yogurt is recommended for its thickness and protein content, you can certainly experiment with other plain yogurts. Thinner yogurts might result in a softer bark, so you may need to adjust the freezing time or add a bit more thickener like chia seeds or a touch of cornstarch if you notice it’s too runny before freezing.
Q: How long does frozen yogurt bark last?
A: Properly stored in an airtight container or freezer bag in the freezer, How To Make Frozen Yogurt Bark With Berries And Nuts can last for up to 2-3 weeks. It’s best enjoyed within the first week for optimal texture and flavor. If it becomes too hard, let it sit at room temperature for a few minutes before breaking it apart.
Q: Can I add sweetener to the yogurt?
A: Absolutely! If you prefer a sweeter bark, you can stir in a tablespoon or two of honey, maple syrup, agave nectar, or your preferred sweetener directly into the yogurt before spreading it onto the baking sheet. Taste as you go to achieve your desired level of sweetness.
Frozen Yogurt Bark- Berry Nut Treat
A refreshing and healthy frozen treat made with yogurt, berries, and nuts. Perfect for a cool snack on a warm day.
Ingredients
-
2 Cups of plain or Greek yogurt
-
1/4 to 1/2 cup of honey, maple syrup, or your preferred liquid sweetener
-
1 Teaspoon of pure vanilla extract
-
A generous pinch of salt
-
1 Cup of fresh strawberries, hulled and thinly sliced
-
1 Cup of fresh blueberries
-
1/2 Cup of your favorite nuts, roughly chopped
Instructions
-
Step 1
In a medium-sized bowl, combine the yogurt, sweetener, vanilla extract, and salt. Stir until smooth and well combined. -
Step 2
Line a baking sheet with parchment paper or a silicone baking mat. -
Step 3
Pour the yogurt mixture onto the prepared baking sheet and spread into an even, thin layer (about 1/4 to 1/2 inch thick). -
Step 4
Arrange the sliced strawberries and blueberries over the yogurt layer. Sprinkle the chopped nuts evenly on top. -
Step 5
Carefully transfer the baking sheet to your freezer and freeze until solid, at least 4 to 6 hours, or preferably overnight. -
Step 6
Once frozen, break the bark into irregular pieces by hand or with a knife. Serve immediately.
Important Information
Nutrition Facts (Per Serving)
It is important to consider this information as approximate and not to use it as definitive health advice.
Allergy Information
Please check ingredients for potential allergens and consult a health professional if in doubt.